I had always wanted the biggest rototiller I could get. I still don't have it, and now you couldn't give me one. I did, however, buy myself a chipper/shredder for Mother's Day one year. What makes gardener's spring for these big-ticket items? What are the alternatives to buying?
For me the rototiller became a non-necessity when I changed gardening styles. By forming raised beds, I eliminated the need for a tiller,
the soil stays soft, and is easy to turn with a spade in the spring. In fact, a tiller would make more work by tearing up the beds. But the shredder was different. Lots of barnyard critters, weeds, and pine cones add up to lots of waste that requires managing on a regular basis. The shredder makes quick work of turning mountains into molehills.
When considering adding tools to your gardening ensemble, take a hard look at how often you will use a new piece of equipment. If, like that heavy-duty rototiller, it will only see action a couple of times a year, think about renting one only when you need it. It is less convenient to pick it up, lug it home, and return it after use. But think about the perks. There are no maintenance costs, no storage, no parting with the purchase price, and you still save money. For example, a tiller, with a five-year warranty, sells for around $800. A similar machine rents for $40 an hour. You can rent that machine once a year for twenty years, or twice a year for ten years, before you spend the amount it would cost to buy it. Other "occasional-use" equipment you might consider renting include the chipper/shredder, hedge trimmers, and leaf blower.
Neighborly cooperation can go a long way to saving money as well. Get a nearby gardening friend or two to share your rental. Most rental companies charge just as much for the half-hour it takes to drive the machine home as they do for the time it is in use. By splitting the expense with others, you cut down on wasted rental time.
Thursday, December 31, 2009
A Fix for Hoses
My hoses seem to get shorter every year. That's because rather than throw them away after accidentally smashing the couplings or cutting them in half, I repair them.
There are two types of repair kits available at garden centers. They differ in how to secure the coupling. One type uses prongs that clamp down around the end of the hose, and the other applies a band at the hose end.
First cut away the damaged coupling or shredded section of hose. Soak the hose end in hot water for a few minutes to soften. If using a band repair kit, slide the band over the hose, and insert the fitting. Tighten the band as close to the coupling as possible. To repair with a prong-type kit, insert the fitting, and clamp the prongs down as tightly as possible with a pair of pliers.
Extend the Life of Wooden Tools
You can extend the life of any wooden handle the day you buy it. Use fine sandpaper to remove the finish. With your bare hands or a soft rag, generously rub the handle with boiled linseed oil. The warmth from your hands will help work in the oil, or leave a rag-oiled handle in the sun to warm the oil into the wood. Tung oil or vegetable oils such as olive or safflower oils also make good preservatives. The result is a smooth, water-resistant finish. Replenish with another rub whenever the wood begins to lose its satin feel.
Replace cracked shovel or fork handles. Digging puts a lot of stress on these tools, and having one give out at the wrong moment can be dangerous. Repair splits in hoe or rake handles by prying them open, filling with wood glue or epoxy, clamping till dry, and sanding smooth. It's usually quicker just to replace the handle. Don't ever try to get by with wrapping tape around a cracked handle. It is cheap, but it only hides a potentially worsening problem.
Handles come in different styles, but the method of replacement is about the same. Begin by removing the old handle. There is usually a screw or rivet holding the handle in place. Take the screw or rivet out of the tool socket carefully, without altering the socket shape. You may have to bang the old handle out with a chunk of pipe.
Install the new handle by securing the tool head, spade or fork, in a vise and pushing the handle into the socket. Soak the handle in hot water or coat the socket with a little oil or soap to help the handle slide in easily, especially with curved sockets. Tap the handle as far as it will go. Prevent the new handle from ever flying free by drilling a hole and inserting a nut and bolt through the metal socket into the handle.
Monday, November 30, 2009
Hoes, Spades, Shovels, Forks, Rakes, and Edgers
Keep a bucket of oily sand nearby for keeping tools clean and rust-free. Two things this type of tool deserves are a place to call home and a bucket of oily sand. Mix a bottle of vegetable oil in with clean construetion sand. After each use, hose off dirt and plunge the tool into the bucket with the sand and oil. The sand scours the metal, and the oil coats it preventing rust. Then hang up the tool in its proper spot. If the handles are wood, coat them with varnish, or rub with linseed or tung oil to preserve.
Hoes, spades, shovels, and edgers perform better if the edge is sharp. File tools to a sharp edge at least once a year.
The first rule is never misuse these cutting tools. They are meant to cut stems not wire. One wrong cut can ruin a good blade. Use soap and water to wash away sap or pitch; you may need a bit of turpentine or hand-cleaner for spots that are hard to remove. Scrub tool with steel wool to remove rust. Keep the moving parts lubricated with WD-40 or sewing machine oil. Check nuts and bolts periodically to make sure they are tight. Sharpen if cutting becomes difficult.
Understanding Planting Aids
From starting seeds to maintaining full-grown plants, there is equipment for every step of the way. Almost anything you can buy for those jobs has a free or cheap substitute.
Seed-starting pots are available in plastic or peat. There is no reason to pay for either. Save pots and flats whenever you purchase plants and reuse them. If you purchase less plastic, then you will not have to pay to throw it away.
Soil thermometers can help you decide when to seed temperature-sensitive plants. However, with practice, and perhaps a little trial and error, you'll soon develop a ''feel" for soil temperature that's just as dependable. Just touching the soil will tell you if it's warm enough to plant.
Dibbles make holes in soil for placing seeds. A stick, pencil, or finger performs the same.
Labels are useful for remembering what you planted. Make your own by cutting waxed milk cartons into strips and writing on the plain side with a permanent market. Or push a stick through the seed packet and into the soil.
Plant ties and supports hold plants in place as they grow. Instead of using ties from the garden center, substitute cloth strips, plastic garbage bag ties, twine, or twist-ties, and your plants will never know the difference. Wire tomato cages are too small to support most mature tomato plants. They are great, though, as supports for many types of flowering plants. Use a pair of wire cutters to snip the cage just above the first horizontal wire for two small flower supports. For tomatoes and other vining crops, welded wire fencing, hopefully salvaged, makes a good support. Twine is great for many garden jobs, and it is often free from anyone who feeds baled hay to livestock. Metal fence posts are available in various lengths, are reasonably priced, will last forever, and will support the weight of any crop.
Plant protectors from waxed paper hot caps to entire greenhouses, can really extend the life of plants.
Comforts and Conveniences in gardening
Some items just make gardening easier, and for that reason they may be worth the cost, but there are cheap substitutes you can use for quite a few of them.
Garden gloves protect your hands. Heavier material provides more protection. Cheap cloth gloves keep your hands clean. Heavy-duty leather gloves protect against thorns during pruning or brush-cutting, and guard against blisters after hours of hoeing or spading.
Knee pads or kneelers are valuable for anyone whose knees or back aches after weeding or performing other ground-work. Knee pads allow more free movement than a kneeler that must be picked up and moved every few minutes as you move.
Handle grips are rubber tubes that fit over tool handles, such as hoes, rakes, and spades. They reduce wear on both handles and hands. For a cheap substitute wrap handles with foam pipe insulation, and attach the foam neatly with electrical tape.
Wheelbarrows haul soil, garden waste, and other loads from one place to another. The bed, constructed of metal, plastic, or wood, attaches to one or two wheels, depending on the design. For large or heavy loads, the two-wheeled version is the easiest to use. Metal won't crack like plastic, but it will rust.
Wednesday, October 28, 2009
Understanding Watering equipment
Watering equipment can be costly, but it may save you in the long run by lowering your water bills or pumping costs. Water containers are for carrying and dispensing water. Stores sell all kinds of expensive watering cans, but you can make cheap imitations. Plastic milk or water jugs are ideal. Punch holes in the bottom, put on the cap, and carry upside-down. Turn them over, and remove the cap to sprinkle water.
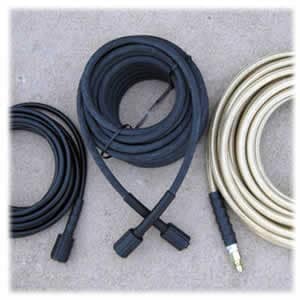
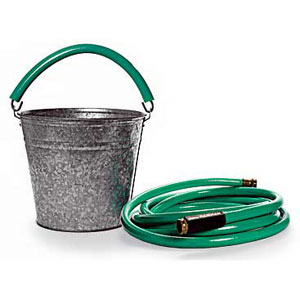
Garden hoses carry water from a faucet to its final destination. They vary in length and can be screwed together to cover long distances. Water pressure from the source forces water through the hose to the end. Rubber and vinyl hoses are the most common, and are available in 1/2-inch, 5/8-inch, 3/4-inch, and 1-inch diameters. Rubber lasts the longest and is least prone to kinking and splitting. For most uses a 5/8-inch size is the best buy. Look for hoses with a lifetime guarantee. Hoses go on sale in spring and fall.
Lawn sprinklers attach to a hose and spray water up and out. They are a tremendous improvement over hand watering for the time they save. Water pressure propels the spray in one of several patterns, with some types covering a larger area than others. The cheapest sprinklers cost between $5 and $8 and are small heads with holes punched in them. They rest on the ground and shoot water up over a limited area. These work all right for lawns, but in a border or vegetable garden the spray may be blocked by foliage. Rotating and pulse-jet sprinklers have moving parts that deliver an even spray. Impulse-jet types are the most versatile, because you can adjust them to water a range of patterns, including a full circle. Oscillating sprinklers have a rocking bar that sprays water. They are not the best for vegetable plots, flower borders, or landscaping plants, because so much water lands on foliage instead of near the roots. If you must use a sprinkler in these spots, elevate it with a step-ladder or other substitute so the spray lands unobstructed. Look for sales in spring and fall.
Drip irrigation systems deliver water through emitters to individual plants. They are great for putting just the right amount of water where needed, but can be costly to install.
Soaker hoses and porous hoses deliver water along their length either through a series of holes, the soaker hose, or through the porous skin. Use some soaker hoses to water lawns as the holes are large enough to send water spraying upward. Turn them over so the water sprays downward to water vegetables or flowers. These hoses conserve water by putting it only where desired by the gardener. Place one along each garden row, or wind through flower beds and landscaping, to save time moving them around. Attach a garden hose when ready to water. Though a soaker hose is a bigger initial expense than a garden hose or cheap sprinkler, the savings on water can pay for the hoses in a couple of seasons. They also will last indefinitely.
Timers shut the water off at a pre-determined time. Cheap ones simply turn it off after a preset time period, while you can program expensive computer models with a complete watering regime. Both models prevent waste from overwatering, but the less expensive mechanical type is simpler to use and should be sufficient for almost anyone.
Water gauges measure how much water lands at a given spot. Save money by placing an empty jar or can in areas you want to measure.
Gas- and Electric-Powered Tools for Your Garden
Most power tools constitute a hefty initial investment, which must be worked off over a period of time. They also represent a monetary commitment to run; they require fuel or electricity, maintenance, and, occasionally, repairs. The trade-off is they save time and effort.
Chipper/shredders reduce garden waste by three-quarters or more. They can be a real boon if you are clearing brush, especially if you cannot burn. Chippers and shredders chop branches, twigs, and leaves into a homogenous mix which can be used as mulch. Shredders also can speed up the process of composting. Since the heavy-duty branch-eaters also make short work of leaves, they are the most versatile. Gas-powered models are the fastest and noisiest. Both types can be dangerous. Rototillers cultivate soil. Models range from 1 horsepower, lightweight tiller / cultivators, designed mainly for mechanized weeding, to 14 horsepower tillers, made for breaking new ground. Sharp digging tines rotate and cultivate the soil to depths varying from 4 to 8 inches. Considering that most plant roots penetrate at least 1 foot deep, a rototiller alone cannot prepare the soil deeply enough to accommodate them. The digging tines may be mounted in the front or rear of the machine. Except for the most powerful models, those designed with rear-mounted tines can be difficult to control at tilling depths greater than 3 inches. Rototillers can be dangerous; never buy one without a deadman control. This safety feature stops the machine and the turning tines when engaged. Lawn mowers cut grass. It's that simple. You may push, follow a self-propelled mower, or ride in style, but you are still simply cutting grass. The only real difference in cutting grass is how much you sweat, and whether the clippings are dropped, bagged, or mulched. Mulching mowers grind the clippings into tiny pieces that work their way back to the soil level. The tiny clippings provide beneficial mulch and eliminate waste. Self-propelled mowers generally cost at least $100 more than similar push-powered models, and the self-propelled models are twice as likely to need repairs. If your yard is small and level, you can get by with the less expensive push mower. If you have hills or a lot of ground to cover the self-propelled model may be better for you.
Some lawn-mower models have a blade-brake-clutch safety system which allows you to disengage the blade action without shutting down the engine. This is a real plus for moving the machine around when it's not actually cutting, say from the garage to the yard. Another helpful feature is a rear-bagging model, as opposed to a side-bagging one; they tend to be more maneuverable. Rear-wheel-drive machines, not front-wheel-drive models, have better traction. If you have physical limitations or a huge lot, a riding mower or lawn tractor may be necessary. Lawn tractors cost more but have the advantage of various accessories from garden carts to snow blades. They are also slightly less prone to repair jobs than riding mowers. Most lawn tractors can't rival the carpetlike evenness walk-behind mowers leave, and expect to spend more money. Don't even consider a lawn tractor without a deadman control in the seat. With the control, as soon as the driver leaves the seat, the engine stops. Tip: Lawn mowers go on sale after the Fourth of July.
String trimmers cut unruly herbaceous growth from weeds to overgrown grass. There are gas- and electric-powered models, but unless you have enough weeds to warrant the gas type, a good pair of garden shears will work instead. Some trimmers can also edge lawns; turn them so the string spins vertically.
Hedge trimmers are for yards with lots of big hedges. Gas-powered models are easy to use, cordless, and have little vibration. But they are loud and expensive. Electric trimmers are cheaper and more lightweight. Those with reciprocating blades, two blades cutting against each other are the most efficient. For most uses, a 16-inch blade is sufficient.
Leaf blowers move leaves. In a large area, a blower will save effort and time over a rake. There are hand-carried, back-pack, and push types, some with attachments. They are loud and expensive, and they take all the fun out of raking leaves.
Understanding Gardening Tools
These are the fundamental tools necessary for gardening. They do not contribute to air or noise pollution, cost virtually nothing to operate, and require little cleaning and maintenance. Yet with a little people-power, these tools perform any task in the garden.
Cultivating tools primarily move around soil. They have a metal head and wooden, metal, or plastic handle. Look for carbon steel or stainless steel heads. If kept clean and dry between uses, carbon steel should not rust. Stainless steel is more expensive, but is rust-proof and makes work easier as soil falls away from it. Coatings on blades can wear off over time, making them a questionable expenditure. Wooden handles, such as hickory, are generally strong, and unlike metal or plastic, can be replaced if broken. Buy a handle that is of a comfortable length for you to use.
Forks loosen soil, cultivate, move bulky materials, such as weed piles and manure, and they lift root crops. In short, forks are versatile. Most forks have four, sturdy, metal prongs attached to a wooden or metal shaft. The best quality forks are those with the prongs and neck forged from a single piece of metal. Avoid forks pieced together or welded. Short-handled hand forks lift up plants and work well for knee-level weeding.
Hoes cultivate, weed, and form seed rows. They may have long or short handles with a blade attached. There are several types of hoes with specific uses. A Dutch hoe or scuffle hoe works well to remove small, surface weeds around plants. A combination hoe has prongs on one side for breaking up soil and a blade on the other for chopping or moving around soil. A triangular hoe creates V-shaped furrows. Hand hoes have short handles and small, narrow blades for cultivating between closely spaced plants.
Rakes create an even and level soil surface as well as rake debris. A forged metal, toothed head, attached to a wooden or metal handle, pulls material. Those with the most teeth work the fastest, because they cover more ground each time you rake. Flathead rakes last longer than bow-head types. Lawn rakes compared to cultivating rakes, are lightweight, and have flexible tines designed to move light debris such as leaves or mown grass.
Spades and shovels dig and turn soil. Splurge on a stainless steel one if you can, as it takes a lot of strain out of digging. A rounded spade turns over soil, while a pointed shovel digs into the ground as well.
Trowels are mini-shovels, great for digging small transplanting holes. They are especially handy for working in containers.
Other cultivating tools include pronged and tooth-wheeled models. The prongs or teeth break up the soil, but work well only after the soil has already been cultivated, and only to a shallow depth.
Pruning tools cut woody growth. Pruning is necessary to keep many plants in their prime . Short- or long-handled pruners, saws, and knives are examples of hand-held pruning tools.
Pruners work like scissors to snip branches. Buy pruners that give a clean, crisp cut. Ragged edges can leave plants open to infection. Get the best-quality stainless- or carbon-steel blade you can afford. Bypass pruners are the most versatile. Anvil pruners, unless kept very sharp, crush stems. Coated grips are worth the expense; they are more comfortable to use than bare steel.
Loppers are long-handled pruners used to cut branches in hard-to-reach places. The leverage created by the long handles makes cutting small branches a snap, and the shears can handle limbs 2 inches thick or more.
Tree pruners cut high branches. They work on a lever system, and some models can extend your reach up to 15 feet high. For most jobs though, a ladder and loppers will suffice.
Saws prune heavy branches. Of the several types available, a Grecian saw is one of the most versatile. It has a curved handle and teeth designed to cut only as you pull towards youself, making it easier to use in tight spaces. Bow saws work quickly, but are unwieldy to use in close quarters.
Knives have many uses in the garden. Use them for pruning, taking cuttings, grafting, and harvesting. A good pocket knife with a sharp, carbon-steel blade is a fine investment.
Shears can trim hedges, snip grass, cut back perennials, or create topiary masterpieces. Look for those with straight, sharp blades on sturdy wooden handles.
Lawn-care tools control where and how your grass grows.
Edgers make a clean cut at the border where grass meets another ground cover, such as pavement or planting beds. A sharp, half-moon-shaped head slices away sod. A sharp spade or garden knife does the same job.
Hand-held weeders such as ball weeders or a notched asparagus knife are useful for popping weeds out of the lawn without tearing up the turf.
Push-reel mowers may be a relic whose time has returned. Rotating blades cut grass evenly and provide a workout at the same time. Compared to motorized models, they are cheap to purchase, and they don't have any operating costs, except for occasionally sharpening the blades. Push-reel mowers also don't emit pollutants from burning fuel.
Spreaders apply fertilizer to lawns. There is a shoulder-carried version in which you turn a crank to spin granules out onto the lawn. But the more useful option is a hopper on wheels that you push. Most let you adjust the rate of application to your needs.
Monday, September 28, 2009
Save water through Planning
Most of us have more water than we know what to do with. Even in and regions there are occasional deluges of rain. Rainbarrels are not a new idea, but still a useful one. Position clean, empty barrels beneath downspouts or up on blocks around the garden. Barrels, positioned a few inches above the ground, can incorporate spigots and drip tubing for a cheap, gravity-flow irrigation system. A barrel positioned high above the ground creates strong water pressure, and far-flowing water. This time-honored method is excellent for flower or vegetable gardens.
Lawns are water hogs. They also consume their share of fertilizer, mowing time, and expense. Compared to native landscaping or a xeriscaped yard they are a ludicrous luxury. (Xeriscaping is the landscaping art of combining drought-tolerant plants, garden design, and water-conserving tactics to create a low-maintenance landscape.)
Consider reducing water and other bills by creating a smaller lawn. You may even find that by enlisting the services of a paid professional landscaper, you could save buckets of money. Or try gradually replacing some of the grass with less thirsty landscape plants.
Be aware of which plants require the most water. Group them together so you don't waste water on plants that don't need it. Plants such as rhododendrons, azaleas, and ferns need more water than cacti. Also, if your yard has a naturally moist microclimate, put the water hogs there, not on the driest point of the property. Consider landscape points of interest that doesn't require water, such as a dry creek-bed of rock. Make it appear wet by varnishing the rocks. Position sprinklers to avoid watering sidewalks, streets, decks, and other structures; they won't grow.
Water Loss Means We All Lose
In a perfect world every drop of water you put on your plants would run straight to the roots and would be used immediately by the plant. But we have to deal with water loss. Knowing how to reduce it saves water and money.
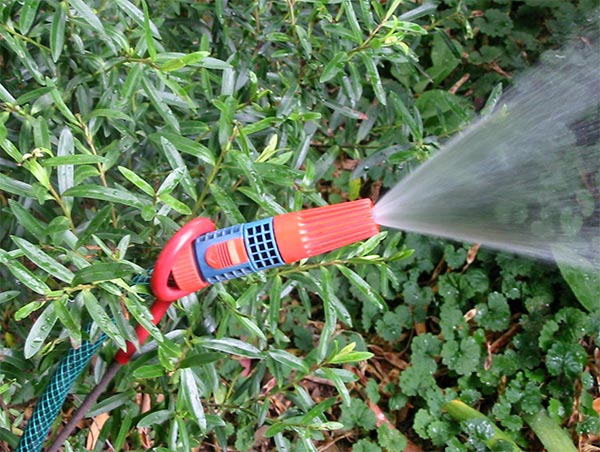
Moisture is lost from the soil in several ways, but you can cut these losses. By incorporating lots of humus into the soil, you will lessen the amount of water that percolates through the soil and out of reach. Humus is a water magnet. A lot of water is also lost through evaporation from the soil surface. Thanks to capillary action through the soil, which draws water up from below, evaporation can deplete water from deep in the ground. Keeping the soil surface covered with mulch (see pages 109111) protects against this. Another line of defense against evaporation is to get less of the soil surface wet in the first place. This means replacing a sprinkler with a drip system, soaker hose, or individual water containers for landscape or large vegetable plants. Finally, transpiration, the way in which plants metabolize water, can steal amazing quantities of water from your soil. One large shade tree on a hot sum mer day can transpire several hundred gallons of water. Misting plants on hot, dry days helps limit the amount transpired and reduces plant stress.
As mentioned, air evaporation is also a major water waster if you use an overhead sprinkler. Water early in the morning or at night for the least water loss. If you want to keep your water bill down, never water during hot, windy weather.
How Much Water Is Just Right?
While there is no one answer to the question of how much water is just right for all gardens, there are some useful general guidelines. The most efficient and cost-effective way to water any plant is to fill the entire root zone with water, and let the soil become almost dry be fore the next watering. The amount of dryness depends on the plant. Let the top 2 or 3 inches dry out for most established plants. Let the soil around a large tree dry down several inches, but keep new or tiny plants moist to the top inch or so of soil.
Water most plants deeply and infrequently. When using a sprinkler, measure how many inches of water you apply by setting jars at intervals along sprinkler pathways. This will also tell you if the sprinkler gives even coverage.
Remember soil type affects how much water is necessary. Water sandy soils more frequently than clay soil. To make sure you are delivering enough water to where it is needed, use a soil probe or shovel before you water to determine the extent of dryness. Repeat the process after watering to see how deeply the water has penetrated into the soil.
Lawns. Use an overhead sprinkler. Water to a depth of at least 6 inches as soon as grass fails to spring up after walking on it. Avoid frequent, shallow waterings as they lead to shallow roots, which are far more susceptible to heat or drought. Aeration, or removal of soil plugs, helps send water to the root zone. Renting an aerator every other year or so also will help to reduce thatch build-up and combat compaction.
Vegetables, Bedding Plants, and Perennials. Water 6 to 12 inches deep every four to ten days for established plants. Don't wait for plants to wilt before the next watering. Wilting slows growth and reduces crop yields.
Soaker hoses or drip irrigation are efficient ways to water here. They can save up to 60 percent of the water used by a sprinkler. Place mulch over the hose to prevent evaporation.
A cheap version of drip irrigation is container watering. Bury a container, such as a plastic 1-gallon milk jug that has had 2 or 3 holes punched in the bottom, next to or between individual plants. Keep the containers filled with water and allow them to seep water directly into plant root zones. Tailor the size of the container to the size of the plant.
Sprinklers are not the best for vegetable gardens because they waste a vast amount of water. More water lands on the leaves, where it evaporates, than anywhere else. Hand watering is as much a waste of time as it is water. Unless you stand there for a few hours with a water wand, you cannot wet the soil deeply enough to do a worthwhile job.
Cultivate unmulched soil to increase water absorption. Crusted soil forms a barrier against water penetration.
Trees, Shrubs, and Landscape Plants. Water throughout the drip line of plants for the most efficient intake of water. Soaker hoses (see page 31) allow you to wind around individual plants. They are great for such shrubs as roses that are susceptible to moisture-loving disease organisms. Since no water rests on the leaves the diseases can't establish their spores. To allow water to slowly seep down into the soil, mound a ridge of soil around the outside of the drip line to form a basin and fill with water. Remove this soil during rainy weather to prevent waterlogged roots.
Plants on landscape berms. Check and water more frequently since they have more exposed soil from which water may evaporate.
New woody transplants. Water thoroughly both the nursery soil within the root ball and the native soil surrounding it. Failure to do so may prevent the roots from venturing into the surrounding soil, which can eventually kill the plant. Dead plants are an investment wasted.
Plants in containers. Water as soon as the surface feels dry. Keep a close eye on thirsty plants such as fuschias, which often need watering once or twice daily in hot, dry weather.
Saturday, August 29, 2009
Watering your plants
If you still use a lawn sprinkler to water a vegetable garden or landscape planting, or if you use an overhead watering system on hot, windy days you are wasting water. The idea of watering is to deliver an adequate amount of water to plant roots, no more, no less, and nowhere else.
There are several factors that determine how much water you need to apply and the best method of application. For starters, rainfall is a factor. No matter what plants you are watering in what type of soil, the amount of watering necessary depends on how much nature already supplies.
Another factor is the soil type. Remember that sandy soils drain quickly and that clay holds moisture for a longer period of time. These are functions of how the water moves through the soil, which affects its availability to plant roots. One inch of water applied in sandy soil will percolate down 12 inches. In good loam 1 inch of water will go down 6 to 10 inches, and in clay it will penetrate about 4 or 5 inches. Once water has filtered down beneath plant root zones it is effectively gone.
Finally, consider the plants you are watering. Some plants need much more water than others. New plants, from seeded lawns to bedding transplants and burlap-balled shrubs, require lots of frequent watering to establish their roots. On the other hand, established native plants need very little rainfall supplementation; they have naturally adapted to the area. Some plants, such as madrona, flannel bush, and western dogwood, suffer if watered in the summer.
Understanding Soil Acidity
Acidity and alkalinity describe measurements of the pH balance. The pH level is measured on a scale from 1 to 14. 1 is extremely acidic, 14 extremely alkaline, and 7 is neutral. Each number represents a tenfold difference in acidity or alkalinity. Soil that has a pH of 6 is ten times more acidic than soil with a pH of 7. Most plants prefer a slightly acidic soil, while some, such as blueberries, prosper only in very acidic soils. Very high or very low pH affects the availability of soil elements to plants, which makes pH a key factor in nutrient supply.
Gardeners commonly alter pH with lime and sulfur products. Lime raises pH (reduces acidity) and sulfur lowers pH (raises acidity). Since young plants are very sensitive to pH levels, add amendments the season before you plant to give the additive time to change the acid balance. Often gardeners are impatient and don't give purchased products a fair chance to work, simply another waste of money. Also, apply lime at least thirty days prior to using fertilizers; they bind each other up when applied together, essentially wasting the money spent on both products.
Other soil additives also affect pH balance. When applied heavily, manures, sludge, peat moss, coffee grounds, and high-nitrogen fertilizers raise acidity.
A Guide on Organic Fertilizers
You know you want humus or organic matter and also that other nutrients are necessary for soil and plant health. But before you run down to the garden center, let's consider some alternative low-cost soil
amendments, where you can get them, and how they will help your garden.
Compost. Your own backyard is the best and cheapest place to find this valuable soil amendment . You also will find it in the garden center's soil amendment section. Also, cities and counties are getting into the act with community composting. You can find huge heaps of the stuff near your local trash dump. Bring your own containers or a pick-up truck, and get your share for nothing or a nominal fee.
Mushroom compost. If you happen to live near a mushroom grower, they are an excellent source for low-cost or free compost. Mushrooms are grown indoors in huge containers filled with fine, dark, crumbly compost. Before growers plant mushroom spawn in containers, they steam-sterilize the compost. After a couple of months, growers harvest the mushrooms and clear out the bins. This used compost is still rich in nutrients and organic matter. A few little mushrooms may pop up, but since you know they are an edible variety, eat up.
Sewage sludge. Plants treat sewage for disposal using two methods, anaerobic digestion and air activation. Digested sludge is much lower quality as a fertilizer than the activated type. Activated sludge is usually much more expensive. Either type of heat-treated sludge is safe to use around your yard and garden. Inquire at your local treatment plant.
Green manures. When you spade green vegetation into the soil, you add precious organic matter, nutrients, and moisture. Green leaves, weeds, grass clippings, and cover crops such as clovers, buckwheat, rye, and oats return nitrogen, carbon, trace minerals, and other nutrients to the soil when turned under. Legumes, such as clover and alfalfa, make exceptional cover crops because they take nitrogen from the air, and convert it into a usable form for plants. One word of caution: If your plants go to seed, don't turn them into your garden soilunless you want more of them.
Animal manures. Where there are animals, there will be manure. The first rule is never use cat, dog, or swine manure in your garden. These types of manure harbor parasites and disease organisms that can be harmful to your health.
Racetracks, livestock breeding farms, dairy farms, rabbit runs, poultry farms, petting zoos, and non-petting zoos often are overjoyed to have someone actually volunteer to haul the manure away! Most manures should not be used fresh in the garden; salts will burn plant roots. Compost it first, or spread it over the soil in the fall so it has time to mellow.
Rendering plants. Organic gardeners are familiar with additives such as blood meal (rich in nitrogen), hoof and horn meal (high in nitrogen, phosphorus, and calcium), and bone meal (rich in nitrogen, phosphorus, and calcium). These are by-products of the slaughtering process and originate at rendering plants. Purchased in small quantities, these products are usually quite expensive. Most rendering plants sell these only in bulk, such as 25-ton tractor/trailer loads. Make friends with a plant worker who may be able to get you a smaller quantity!
Restaurants. Coffee grounds from espresso bars or coffee brewers are a good source of nitrogen. Ask the brewer to empty coffee grounds into a container for you to pick up once a week. The grounds are fairly acidic and useful in lowering pH levels when heavily applied.
Lumber mills. Sawdust is the by-product of turning trees into boards. Composed of cellulose, sawdust is a good form of organic matter for your garden. Don't add more than 2 inches each year as it requires a lot of nitrogen to decompose. For each ton of sawdust, a garden burns about 31/2 pounds of pure nitrogen. Offset this by adding 17 pounds of ammonium sulfate, 11 pounds of ammonium nitrate, or 8 pounds of urea. Avoid cedar sawdust, because it is toxic to some seedlings. Alderwood dust decomposes more quickly than others, such as fir or hemlock.
Tuesday, July 28, 2009
Don't waste money giving plants more nutrient supplements than they can absorb.
The major elements are those listed on plant food labels as N (nitrogen), P (phosphorus), and K (potassium, available as potash or K2O). Many soils are naturally high or low in any of these, but nitrogen is the most water soluble, and therefore the most likely to leach away (and into ground-water supplies). Adding more nitrogen than plants can take up is a waste of money.
The elements plants use less of are called secondary elements. They are no less critical to healthy growth than the major elements; plants just require smaller doses of them. They are calcium (Ca), magnesium (Mg), and sulfur (S). Don't waste money by adding these to your soil on a yearly basis, because plants take them in slowly, and they don't leach away. A single application usually lasts several years.
Trace or micronutrients are those that plants require only small amounts of. They include boron (B), manganese (Mn), copper (Cu), zinc (Zn), iron (Fe), molybdenum (Mo), and chlorine (Cl). Short of a soil test, the best way to tell if you need to add any of these is by plant response.
Is Your Soil Nutritious?
So you agree humus is good stuff. But will your soil contain all the nutrients necessary for healthy plant growth if all you add to it is humus? You already know incorporating organic matter that becomes humus means you will probably have to add nitrogen. Plants also need many other nutrients.
With the exception of carbon, which plants take from carbon dioxide in the air, as well as hydrogen and oxygen, which they derive from water, all other elements plants use must come directly from the soil. So what do they need?
Start with healthy soil for healthier, longer-lived plants
Thou shalt not skimp on soil preparation! The more you put into your soil, the more you will get out of it. What, you may ask, is the big deal? Dirt is still dirt, right? The truth is your soil health predicts the health of your entire garden. Rich, healthy soil sustains healthy plants that are more productive and give you the best possible return for your gardening investment. They also cost little or nothing in pesticides, fertilizers, and replacement.
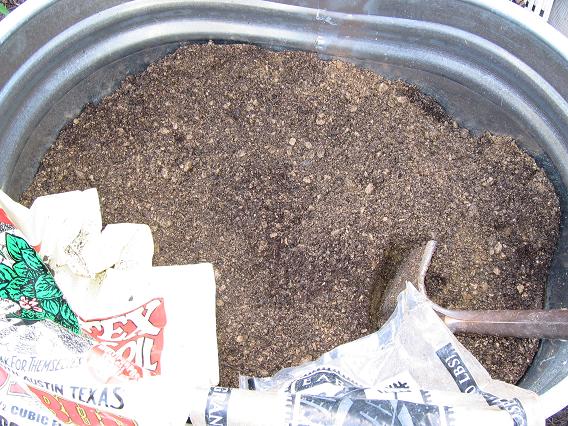
For a better understanding, look at the functions of soil in your garden. Soil provides physical support for the plants and a reservoir for
nutrients, water, and oxygen. Some soils do the second part better than others. Sandy soils drain quickly, providing plenty of oxygen, but they also lose water, and dissolve nutrients too quickly. Clay holds minerals and moisture well, but drains poorly. The magic ingredient for improving either type of soil, or any type in between, is humus.
Humus is organic matter that has gone through a degrading experience. Organic matter is the remains of previously living things, such as plants, micro-organisms, bugs, and us. When added to sandy soils, humus improves water retention by attracting water molecules. When added to clay, humus improves drainage by breaking up the clay particles that naturally cling together. Humus also provides fuel for millions of micro-organisms that reside in the soil. As they break it down, the micro-organisms release elements necessary for plant growth.
High levels of humus are a sign of well-managed soil. It is best to add small amounts of humus each year and build it up, rather than dump it all on in one application. This is important because in the process of decaying organic matter, micro-organisms tie up precious soil nitrogen, which must be replenished. A good rule of thumb is to add not more than 4 inches of organic matter each year to any garden area.
Incorporating humus into your garden can be as cheap or expensive as you make it. Not surprisingly, the cheaper ways are more work than the expensive ones. The ideal way to incorporate humus is to compost. Barnyard manures also provide plenty of partially processed organic matter. Of course, garden centers offer bags of dried organic matter in the form of peat moss, processed compost, and steer manure. The advantage of compost, manures, or commercial products containing fertilizers is they also contain soil nutrients, usually including necessary nitrogen. So while it is less expensive to compost your own, the good news about buying bags of fertilizer is your money will be well-spent.
Tuesday, June 23, 2009
Mix Your Own Soil
A standard formula for mixing planting medium is:
1 part soil
1 part peat moss
1 part perlite, vermiculite or sharp, clean sand
1 part compost (optional)
Find a container large enough to suit your needs and stir in the above ingredients until thoroughly mixed type of plant. The biggest mistake gardeners make with containers is shoveling garden soil into them. It compacts when used in containers. Compacted soil squeezes out oxygen, dries out easily, and is difficult to wet again thoroughly. All this results in unhealthy plants. Even though dirt from your yard is free, to use it alone in containers will cost you.
There are countless reliable growing mediums sold in garden centers, and they are a good investment. But, you can mix your own for less money than you can buy it.
You can incorporate garden soil in your mix to save some money. Use only a rich, loamy soil and sift out any clods, stones, sticks, or other foreign matter. Healthy transplants and established plants can tolerate raw soil in the mix. If you are starting seeds, however, pasteurize the soil you add to your mix: Garden soil teems with tiny life-forms, from visible bugs to invisible ones. This is a dirty, smelly job and a great argument for germination mixes without soil. To kill off all soilborne organisms properly, heat soil to over 140°F for about thirty minutes. You can do this with pans in an oven.
Customize mixes for the type of plants you are growing. For plants requiring free drainage, such as cacti or succulents, add an extra part of sand or perlite. For those with specific nutritional requirements, mix in fertilizer accordingly.
The container. As for the containers you should use, there are a few things to consider. Will you be raising food or ornamentals in them? Never grow food crops in containers that have previously contained something unknown or questionable. Plant roots transport many toxins; they could end up on your dinner table. Also, the container must have drainage holes at the bottom. A larger container requires more and larger holes. Poor drainage kills off more plants than anything else.
The material the container is made of can affect the plants. Metal containers get very hot in direct sun and transmit the heat to tender plant roots. Black plastic pots absorb more heat than light-colored ones. But many plants, such as poinsettias, must have their roots in a dark environment. Wood containers may harbor fungi. Stone or brick containers absorb heat, and release it slowly. Terra cotta or clay pots are decorative, but they absorb water away from plant roots. Peat pots also absorb water from roots.
Lovely, decorative containers abound in trendy garden centers, and they can set you back a few bucks if you must have them. But creativity and an eye for unusual items are free.
Salvage an old pair of cowboy boots, and fill them to overflowing with lobelia or ivy geraniums. An old wheelbarrow makes a purposeful planter, deep enough for carrots, large enough for broccoli, and decorative enough for a variety of flowers and trailing vines. Wooden crates, dented metal buckets, plastic-lined wicker baskets, hollowed-out logs, leaky watering cans, antique milk cans, discarded lunch boxes, junked, claw-footed bathtubs, unseaworthy rowboats or canoes, and countless other finds make fun, functional, frugal planters. See what you can find.
Exploit Microclimates
To understand microclimates a little better, let's look at a typical house and yard, as illustrated. The north side of the house is shady from mid-morning through the end of the day. The east side receives morning sun, but not direct sun in the afternoon. The south side's yard receives full sun all day long. And the west side of the house doesn't get full sun until mid-day, but then bakes until dusk. Each side of the house has a different set of growing conditions and is a distinct microclimate. Additional landscaping will create even more microclimates. A white painted fence along the yard, a pond, trees, and bushes will produce different growing conditions for plants near them. Why should the cash-conscious gardener care about microclimates? Because if you plant things where they don't like to grow, it's a waste of money, time, and effort. Plants all have their own unique growing requirements. Some plants thrive in shade, while others falter there for lack of sunlight. When assessing your site, note your microclimates. They will help you decide what plants to grow and where to put them.
Elements you really need to start a garden
What elements do you really need to start a garden? The simple requirements are soil, water and seed. But what about location of the soil, the type of soil, and its structure and content? How much water is necessary, and how will you deliver it? Thousands of seeds in garden varieties are available. How will you narrow your choices? Do you really want seeds, or should you get transplants instead? See what I mean, it's simple.
Let's begin with the first choice every budding gardener must make: the site of the garden. Whether you are landscaping a small, city plot or planting a large, country garden, you still must take stock of your site first.
Imagine what you'd do if you could choose the perfect garden site.
The Perfect Garden Site Avoids:
® Low-lying pockets. Frost settles in low areas, air does not circulate freely.
® Exposed hilltops. Exposure to wind and temperature extremes makes gardening a challenge.
® North-facing slopes. They receive less sun and are often cooler than surrounding areas.
® Shade, if planning a fruit or vegetable garden.
® Compacted ground, such as former parking lots or areas where
heavy machinery has been used. It's murder to convert such areas into decent growing soil.
® Subsoil. Unfortunately, this describes almost all new housing sitesas well as parking lots, because contractors often scrape away precious topsoil.
® Sand or clay. Both extremes have their challenges.
The Perfect Garden Site Features:
® A gentle south-facing slope. It will receive full sun and the slope facilitates both water drainage and air circulation.
® Well-draining soil. Test by digging a 1-foot-deep hole, and filling it with water. If it takes more than a few hours to drain, you may want to take steps to improve the drainage. (See "Soil Toil," page 9.)
® Fertile, friable loam, rich in humus. Nobody ever just finds soil like this; it takes years of building. But it is nice to dream about it in a perfect site.
® Full sun. Many plants prefer it, and you can surround those that require shade with trees, shrubs, or garden structures.
® Available water. Realistically, how far are you willing to lug the garden hose?
Make the Most of Your Site by Finding Out About:
® The average rainfall for your area.
® The average first and last frost dates, from which you can then calculate your anticipated growing season.
® Low temperatures in your area and your USDA Zone designation.
® Your soil's pH.
And Consider Such Facts As:
® Gardens in cities are warmed by the artificial environment surrounding them, which extends the natural growing season. Plants and gardeners also must be able to tolerate air pollution.
® Seaside gardens get whipped by salty winds, but are buffered from sudden temperature changes.
® Nearby bodies of water substantially change the immediate growing conditions. They retain heat through the day and release it over a prolonged period of time.
® Higher elevations usually mean lower temperatures.
Wednesday, May 27, 2009
Mulching for your bulbs
Mulch helps keep down weeds, can add organic matter to the soil, retains moisture, and stabilizes the soil temperatures. Stable soil temperatures are important so the bulbs don’t sprout too soon and risk freezing damage from a late spring cold snap.
Shredded leaves, compost, or bark chips are all fine choices for mulch. Sprinkle it lightly around your bulbs just after planting them or when they’re up and growing. And add some more mulch after the show is completely over.
Fertilizing bulbs
Although newly planted bulbs have all the stored foods they need to perform the following spring, annual fertilizing can help keep this show going year after year.
A general-purpose fertilizer works fine for bulbs. A higher phosphorus content is often recommended simply because it inspires root growth as well as flower production. So go ahead and use the 5-10-5 or something close to this ratio.
People often recommend bone meal for bulbs, with its approximate formulation of 2.5-24-0. Alas, modern-day, store-bought bone meal is highly sanitized, and its benefits are questionable. Nonetheless, some bulb enthusiasts swear by it. This natural material tends to be very slow to release it nutrients, so some gardeners prefer using super phosphate instead; this material is rock phosphate that has been treated with sulfuric acid to make it more soluble. It’s 20 percent phosphorous (0-20-0).
Some people debate over where to place the fertilizer. In the hole? On the soil surface (top-dressing)? The case for adding plant food to the planting hole is that it’s right at the roots, where plants need it (some people are concerned that direct contact with fertilizer will burn a bulb or its roots, but not all bulbs are so fragile). The case for soil-surface feeding is that the nutrition can filter into the growing area more gradually.
What to do? Try whichever way is more convenient for you, and judge the results. You can always switch methods.
You need to fertilize only once, and you have three opportunities to do so:
- At planting time (usually in the fall): Fertilizing at planting time gets the bulbs off to a good start.
- As growth starts, usually in early spring: This fertilizing improves the current season’s display. Individual plants will be more robust, with brighter, longer-lasting blooms.
- Post-bloom: While the foliage dies down naturally, this little boost sends food down to the bulb to fuel next year’s show. The standard application rate for fertilizer is a tablespoon or small handful per square foot, but read the label on the fertilizer package for exact directions.
Watering your bulbs
Just like grocery-store onions, bulbs rot with too much moisture. And yet, they need water to generate roots and get growing. But don’t fret — there’s no mystery or careful balancing act. Just grow bulbs in well-drained soil; they can use the water they need, and any excess moisture should drain away. Fall-planted, spring-flowering bulbs have it easy if you live where fall rains water them in and spring rains wake them up. (Of course, in an uncharacteristic dry spell, you can provide supplemental water.) Summer- and fallbloomers appreciate water most when they’re beginning to emerge and again when they open their flower buds. Water at these times only if the soil is dry.
Sunday, April 26, 2009
Putting in the bulb
You want the nose, or growing point, to point up and the roots, or basal plate from which they’ll grow, to point down. (If you can’t tell, plant the bulb on its side — the plant will figure it out in due course! Botanists call this nifty skill gravitropism.) Make sure the bottom of the bulb is in contact with soil; if you leave an air pocket, the roots can dry out and the bulb won’t grow or won’t grow very well.
As you scoop soil back into the hole, firmly press it in place to prevent
air pockets. Water well (some settling will occur) and then add a bit
more soil as needed. Indicate where you’ve planted your bulbs so you don’t plant other flowers in
the same place. Mark the locations with perm
Adding a fertilizer for bulbs
Use a fertilizer that has a higher phosphorus number, such as a 5-10-5 fertilizer Phosphorus (the P in the N-P-K on fertilizer labels) is important for the root growth as well as flower production. Just sprinkle the fertilizer in the bottom of the hole and scratch it in so it mixes with the soil a bit. If the ground is bone dry, water a day or so before planting so the ground is damp but not muddy when you’re planting the bulbs. If you want to wait to fertilize, you can scratch the fertilizer into the surface of the soil in the spring as the bulbs are growing.
Digging the hole for Bulbs
If you’re planting only a few bulbs or you’re spot-planting (tucking bulbs in among other plants in a mixed bed), use a trowel. Various bulb planters are on the market, but frankly, I don’t find them very useful unless the soil is loose. If you’re planting lots of bulbs, break out the shovel and make a trench.
Not all bulbs are the same size, so not all bulbs should be planted the same depth. The general rule is three times as deep as the bulb’s height. This guideline varies a bit based on your soil type. In sandier soils, you can plant a little deeper; in heavy clay soils, a little shallower. If you forget how deep to plant your bulbs, consult the supplier’s label or catalog. Too shallow, and your bulbs may poke their heads above the soil surface too early and get damaged by wintry weather; too deep, and they’ll take longer to emerge.
Roots grow out of the bottom of the bulb, so the quality of the soil underneath it is more important than what you pack the hole with. If you’re amending the soil with organic material like compost or sphagnum moss, dig somewhat deeper-than-recommended holes so you can accommodate this addition. Distance apart varies with the type of bulb and the sort of display you have in mind. If you crowd the bulbs underground, the eventual show may suffer. Certainly, don’t let the bulbs touch one another. The general rule is at least three bulb-widths apart “on center” (from the center of one bulb to the center of the next). But experience can tell you what the bulbs you’ve chosen tolerate and how dense you like your displays.
Sunday, March 29, 2009
Naturalizing: Plants gone wild
Naturalizing is just a gardening term (and a rather sensible one, actually) to describe bulbs usually planted in large informal drifts, where they remain undisturbed and multiply. You can naturalize in a grassy area, under fruit trees or other deciduous trees, at the edge of a wooded area, or on an embankment. You want a semiwild area, because the bulb foliage should be able to die down undisturbed after the plants finish blooming. Over time, the bulbs tend to increase their numbers, spreading out the show with each passing year, with virtually no effort from you.
To begin, invest in a large amount of good-quality bulbs. On planting day, literally toss them out over the chosen area and plant them where they land. This display ends up looking more spontaneous and, well, natural.
Planting Bulbs in Containers
Growing bulbs in containers handily solves every display problem. Individual plants can get exactly the sort of soil and planting depth they prefer. When the bulbs come into bloom, you can place them front and center on your porch or patio or even tuck them into a flowerbed and enjoy them at their peak. You can turn or elevate the container to show off the flowers to best advantage. And when the blooms and foliage begin to fade away, you can move the plants out of sight and replace them with pots of fresh reinforcements. Something about a potful of blooming bulbs is so immediate and perky.
They’re right before your very eyes, cheerily delivering their jolt of color. You can line your front steps with them or place a pot in the middle of the patio table, like a living bouquet.
Pots dry out faster than garden-bed soil. Keep your potted bulbs watered. Consistent water (that is, every day or two instead only when the plants are gasping) leads to a healthier, longer-lasting show. Also, if you’re in a cold climate, be sure to pot your bulbs in containers that can freeze without breaking, like plastic.
One drawback: In most climates, bulbs grown in containers are spent after one blooming cycle. If you enjoyed them, you have to start over next year with fresh new bulbs, unless the pot is large enough for the bulbs to go through their dormancy and remain in good health.
Saturday, March 28, 2009
Planting Bulbs in Flowerbeds
Flowering bulbs are very happy in prepared flowerbeds. They receive the good, loose soil they relish and the elbow room they need. Here are two good approaches:
- Bedding schemes: Perhaps you’ve seen these beds in public display gardens: broad areas devoted to nothing but, say, tulips. The mass of color can be very impressive. You can prepare these flowerbeds at home. Pick a nice, open spot, choose a large amount of the same or very similar bulbs (in terms of color, height, and/or bloom time), and plant them fairly close together.
- Mixed beds: Bulbs are only part of the show in a mixed bed; they can share the stage with early-blooming perennials, some colorful annuals, and perhaps a few sheltering shrubs. The overall show never declines: Whether you’re waiting for the bulbs to burst into bloom or waiting for their fading foliage to die down, you always have something to look at and enjoy.
Wednesday, February 25, 2009
Keeping your cool: The skinny on forcing bulbs
Forcing bulbs may sound cruel, but the term merely means that you’re encouraging the plants to bloom early by treating them in a special way. You can force potted bulbs into early bloom, but they still need 8 to 16 weeks to chill (generally the larger the bulb, the longer the chilling time). Place the bulbs in the fridge, in an unheated garage that doesn’t freeze, on chilly basement stairs, or in a cold frame (a wooden or concrete block box buried in the outside soil during the cold months). Some of the easiest and most popular bulbs to force are paperwhites.
As soon as you pot the bulbs you want to force, you have to keep them cool and the soil lightly damp. If the soil dries out, their roots won’t form, and if the temperatures are too warm, the flower buds in the bulbs may end up being blind or will blast (they’ll shrivel and never develop into full blossoms).
Forcing spring bulbs has two stages, and the first is the rooting period. For the rooting stage, place the potted bulbs in any cool (40–50°F), dark spot for 10 to 16 weeks. Some varieties take longer than others. Don’t worry if the temperatures aren’t in this range every day; the temperature range is just the ideal. The important point is that the bulbs are in a cool, not freezing, place to root. A refrigerator is perfect. Tip: Before moving the potted bulbs to the next stage, look at the drainage holes in the pots. Roots should be growing out of the holes; if they aren’t, put the potted bulbs back into a cool, dark area until they are. One of the most common ways people fail in this game is by not allowing the bulbs to root sufficiently before going to the next stage. Alternatively, the bulbs may be ready to come out of the big chill when you see at least an inch of top growth and the bulbs don’t move when you try to wiggle them by hand. After the bulbs are well-rooted, you can move them to the growing-on phase, where the foliage starts to grow and the eventually bulb blooms. First, you want the bulbs to adjust to warmer temperatures and higher light, so place the rooted bulbs in their containers in a cool, bright spot that’s around 60°F for a few weeks. Remember to keep the soil lightly moist. Next, move the bulbs to an area that’s slightly warmer — mid to high 60s — and very bright to finish the plant’s growing-on cycle. A sunny, south-facing windowsill is fine. Turn the pots a quarter turn each day; otherwise, the stems will lean toward the light. You can also place the bulbs so their foliage is a few inches from a two-tube, or preferably four-tube, fluorescent light fixture.
The bulbs should bloom in about three to four weeks. The blossoms will last longer if you move the bulbs to a spot that’s cool (in the lower 60s) and not quite as bright (without direct sunlight).
Planting summer-blooming bulbs
Most summer-bloomers, such as gladioli, calla lilies, dahlias, tuberous begonias, and crocosmias, love warm soil and toasty summer sun. If you garden in a mild climate (Zones 8 to 10), you can plant these bulbs in the early spring and expect flowers by summer. If you garden in a colder area, early spring planting isn’t feasible. Instead, wait until late spring or early summer — the same time locals plant tomatoes outside — or start bulbs early indoors in a warm spot and care for them until danger of frost has passed; then you can move the plants outdoors. In either case, regular doses of all-purpose fertilizer (applied according to label directions) can nudge your plants into faster, more robust growth and more and better flowers.
To get flowers earlier and longer from these summer bloomers, visit a nursery in late spring or early summer (or place your order then with a mail-order house, either via catalog or Web site) and buy a larger, pre-started plant.
When to plant bulbs
Bulbs aren’t instant-gratification plants. They need some time in the ground before they send forth stem, foliage, and flowers. But they’re not inert when they’re in the ground, of course. They’re generating root growth, which will help nourish the show as well as anchor the plants in place. The following sections explain what different types of bulbs require, depending on when they bloom.
Planting spring-blooming bulbs
Spring-blooming bulbs require a chilling period. They’re dormant when you get them and break dormancy only after the chilling. Winter conveniently supplies this necessary cold period! That’s why you put the bulbs in the ground the fall before you want them to bloom.
Wednesday, January 28, 2009
Purchasing bulbs through mail-order
Sometimes you just don’t have enough time to get to a retail store or you want a particular variety of bulb that’s not commonly found in your local garden center or home supply store. This is where buying from a mail-order supplier can be a real advantage.
Here are the perks of sending away for your bulbs:
- Quality: Mail-order bulbs are frequently bigger and fresher. Every step of the way, from climate-controlled storage to the cushioned box they arrive at your door in, mail-order bulbs get premium treatment.
- Selection: Catalogs and Web sites devoted especially to bulbs are impressive: You can browse beautiful bulbs you’ve never seen at your local garden center. The selection of cutting-edge varieties also comes into play, because bulb merchants often work directly with Dutch growers to get the new and improved bulb varieties that sometimes aren’t produced in enough quantity to be distributed by mass merchants.
- Wait time: There’s a lag between the time you place your order and the day you receive your bulbs. When you order the bulbs matters. If you order bulbs in spring or summer to be sent the coming fall, you may wait many weeks. It you order them in the fall, delivery usually just takes a few weeks, sometime less. Wait time also depends on the supplier. If the seller has the bulbs in his or her warehouse in the U.S., the bulbs are usually shipped faster than if they have to be sent to you directly from Holland.
- Inability to inspect the merchandise: You can’t handle or inspect your bulbs until they arrive. However, all reputable mail-order suppliers guarantee their wares and will replace bulbs or refund your money if the bulbs don’t meet your expectations. Find and read the guarantee and return policies, just in case you have to use them.
Buying bulbs from home stores and nurseries
You can buy bulbs in so many places these days. If you’re a novice and need some planting information, want top-size bulbs, and need help with your selection, garden centers and nurseries are often your best choice. Home centers have a reasonable selection but usually sell smaller bulbs, and they rarely provide much gardening information.
Here are the advantages of buying bulbs in person:
- Instant gratification and impulse buying: You can get the bulbs you want, or come across others that tempt you, and buy them on the spot.
- Immediate planting: Shopping and planting on the same day is an option if you have the time and are feeling gung-ho.
- Poor storage conditions: Normal display-rack or display-box conditions aren’t ideal for bulbs. Some may dry out; others may sprout prematurely. The smaller the bulb, the faster it dries out. In spring, summer-blooming bulbs are often displayed in home stores weeks, if not months, before the soil is warm enough for planting them.
- Lack of variety: Selection isn’t all that varied. Buy spring-blooming bulbs early for late-summer to early-fall planting. That way, the bulbs will be fresh and in the best condition, and you’ll have the biggest selection.
- Questionable contents in the bin: Bulbs may get into the wrong bin as customers pick through them. You may end up with the wrong color or a completely different type of bulb.
- When selecting your bulbs, read bin or packaging labels with care so you know the names of what you’re buying as well as something about the plants, like how tall they get, when they bloom, whether they grow in sun or shade, and how far apart and deep to plant them.
The Search: Where to Get Your Bulbs
Making a successful, beautiful bulb display doesn’t begin at planting time. It begins when you go bulb-shopping or bulb-swapping. Neighbors can be a great resource for extra bulbs when they’re dividing their bulbs. But do be picky: Free bulbs aren’t a bargain if they aren’t strong and healthy. Bulb quality can vary, so starting with good ones is important. Here’s what to look for:
- Appearance: A fresh, good-quality bulb is plump and clean, without obvious damage to its outer layers. Avoid bulbs with disfiguring dents or blemishes, which can let in rot-inducing bacteria. Bulbs may contain a small amount of green penicillin mold, which is rarely harmful. Some bulbs, like anemone and ranunculus, always look dried up.
- Heft: Pick up a bulb and handle it for a moment. Then pick up a few others from the same basket or bin (of the same variety) and compare their weights. Bulbs that feel lightweight relative to their peers are likely to be dried out and not viable (they may even be last season’s leftovers, for all you know). While you’re at it, gently squeeze the bulb. A squishy texture indicates rot, but a good, firm feel means the bulb has sufficient moisture content.
- Size: With bulbs, bigger is better. A larger bulb has more stored reserves and therefore can produce larger and more flowers on more substantial stems. You get what you pay for; you can get incredible deals on bulbs, but they may be too young and small to bloom.
Tuesday, January 13, 2009
A daffodil by any other name . . .
What’s the difference between a daffodil and a narcissus? None! Narcissus is the Latin name for the genus common to all daffodils. Jonquil, another common name ascribed to daffodils, is proper only when you’re referring a particular type, or division (Division 7), of daffodil called jonquilla. Essentially, the name refers to the species Narcissus jonquilla and its hybrids. These plants are the ones that have multiple flowers to a stem, and the blooms are usually very fragrant. In other words, all jonquils are daffodils, but not all daffodils are jonquils.
Mixing up your daffodils
Daffodils simply don’t have the color range that tulips do, but they do offer a fresh elegance in their whites, creams, yellows, oranges, and near-pinks. Daffodils come in about a dozen different forms, too, which aficionados call divisions. These varieties include the ever-popular trumpet forms; little ones that bloom in clusters; daffodils with tiny, almost flat trumpets; and flowers with trumpets so plush with petals they hardly seem like a daffodil at all. A great feature of daffodils is that nothing likes to eat them! Not squirrels, not mice, not voles, not rabbits, not deer!
And many daffodils are scented. Most have a light, sweet perfume that’s not overpowering. (If you’re after knock-your-socks-off fragrance, check out the jonquil type of daffodils.) To capitalize on fragrant daffodils, plant them in quantity so they can make an impression. Or at least plant enough so you can spare some for bouquets and enjoy that wafting sweetness indoors. Here are some tips for choosing daffodils:
- For single-color displays: Daffodils whose petals and trumpet are both the same color, all-white or all-yellow, make excellent massed displays, lovely in their simplicity. For a little more definition, you can seek out a few differently named varieties in the color you like. Varied forms can make such a display more intriguing.
- For mixed-color displays: A planting devoted entirely to yellow-andorange bicolor daffodils is a lot of fun. You can tuck in a few solids just to keep things interesting. Another nice idea is to mix the white-petaled, so-called pink-trumpeted daffodils with some plain whites. Blending all the colors and forms doesn’t tend to work well, because the pastel daffodils jar against the bolder hues and a mix of varied forms often looks too busy.
- For a longer-lasting show: Situate daffodils in an area that gets part-day shade or filtered light.
- For smaller areas or pots: You’re best off devoting a limited area to a single variety or two compatible ones. Miniature growing varieties are also a perfect choice.
Combining various types of tulips
If the only tulips you know are the classic red ones lining a neighbor’s walkway, you’re in for a treat. The world of tulips is amazingly varied. You can find a wonderful range of hues, from royal purple to golden yellow to shell pink to pure ivory white; there are also many fabulous bicolors, especially the smashing red-and-yellow and pink-and-green ones. Forms also vary, from the popular goblet-shaped flowers (mainly the Darwin hybrids) to ones that resemble plush peonies or elegant lilies. Some tulips have flared or fluted petals or petals with fringed edges. Some are nearly knee-high; others are surprisingly low to the ground. All tulips are equally easy to grow. But before you get carried away with an ambitious planting scheme, remember also that although tulips are always spring bloomers, they don’t all bloom at the same time. You can find everything from “single early” to “double late” tulips, and you have to take these designations into account if you want your plans to work out. Check out the following tips for different types of displays:
- For single-color displays: Use a large quantity of the same exact tulip variety and plant closely.
- For mixed-color displays: Stick to a theme, such as pastel or bold colors. Tuck in a few bicolors that tie the display all together. Of course, if you have lots of space, going for the full rainbow can be fun, but to be effective, such a show needs to have a generous number of tulips in every hue.
- For a longer-lasting show: Research the bloom times so you get a range. Then mix up the varieties up throughout the display so it doesn’t look unbalanced and so something is always in bloom.
- For smaller areas or pots: Choose tulips of different heights and place the taller ones in the middle. That way, you can distinguish each one, and the variety and complexity of the show gives it more splash. Don’t plant your tulip display in a shady spot. Some spring bloomers don’t mind, but tulips do.
Choosing to Combine Your Bulbs
A lone bulb isn’t much of a show; nor, in truth, is a scattering or a row of a mere dozen. Bulbs are meant to be planted, enjoyed, shown off in generous numbers. The more, the merrier!
This need for company isn’t just because bulbs are small plants. In fact, some plants can grow fairly tall and even sport big, dramatic flowers. The case for putting in lots of bulbs, in sweeps or mix-and-match displays, is compelling:
The whole is inevitably greater than the sum of the parts. Flowering bulbs simply look fabulous in groups; their natural exuberance is multiplied.
Getting acquainted with the most popular bulbs
You can find many different types of bulbs, but they all have one thing in common: They’re packages of life just waiting to be planted. They differ from seeds in that they contain within them the beginnings of leaves, stems, and flowers. All they need is to be planted and watered, and the growth process can begin.
The common spring-flowering bulbs include tulips, noted for their impressive range of flower types and colors; daffodils, some of the most rugged and easiest to grow of all bulbs; and lilies, which, by planting different varieties, you can have blooming from late spring to early fall. Check out the color insert for a look at some of these bulb superstars.
Subscribe to:
Posts (Atom)