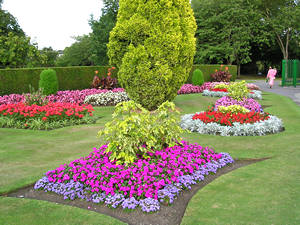
Container plants, similar to bedding plants, have their roots established in a growing medium. Unlike spring bedding plants though, it is best to transplant container plants when doRmant.
Perennials. Grow them in containers or special beds in the garden. Transplant at any time, but spring and fall are preferable. Top-growth is slower at these times, yet roots are still developing. At this stage the plant has the greatest chance of establishing roots before going dormant for the winter. The fun part about planting perennials is planning where you will plant them. Try arranging extensive borders using just the plants you propagate yourself (or sneak in a few store-bought plants if you must).
Make sure you plant perennials at the proper depth. Transplant most perennials at the same level they grew in the container or the field, usually with the crown at soil level. Perennials that tend to rot at the base grow better if planted higher. Plants that require dampness near the crown, such as Solomon's Seal and hostas should be planted lower.
Prepare a perennial bed by tilling and amending the soil at least a few days before planting. Ideally, this is a job for the previous fall. This gives the soil time to settle and mellow. If adding to an existing planting, begin by digging a hole about twice as big around as the roots of the plant and a few inches deeper. As for bedding plants, you can sprinkle in a little fertilizer or compost in the bottom and cover with soil. Water the potted plant and gently slide it from the container without breaking any roots. Carefully loosen some of the root soil. Tease any roots that have begun to grow in circles free of the root ball. Set in place and remove; refill the hole if necessary to adjust the planting depth. Backfill with soil from the hole and water well. As with bedding plants, pay perennials a little special attention until the roots are established.
Vines or climbers. Transplant vines or climbers from containers the same way as perennials. It is usually best to transplant in the spring to give the plant a chance to establish.
Install a trellis when planting climbers, or place the new plant near an existing support, such as a fence or tree. Supports, while necessary for climbers, pose a few challenges. Supports shelter the growing plant from essential rain or sprinkler water. If you use another plant as a support, the two will compete for water and nutrients. Plant climbers at least 1 foot from a support to reduce water deflection and allow for adequate air circulation. But plant them nearer tree trunks, however, since competing feeder roots spread out near the drip line rather than near the trunk.
Plant climbers grafted to a rootstock, such as wisteria and climbing roses, with the graft union below the soil level. This protects the union from extreme temperatures, and prompts the climber to send out its own roots. Also, clematis develops more buds if set about 2 inches deeper than it originally grew.
Shrubs and Trees. These are sold in containers or with the roots wrapped in burlap. The method for transplanting shrubs and trees is similar to the method used for other container plants, but on a larger scale. For roots wrapped in burlap, treat as you would a container plant, unless the soil crumbles. In that case don't worry, just proceed as for a bare-root plant. (See next section.)
Place the plant in the ground. Without burying the plant any deeper, backfill about halfway and water well. Finish filling the hole, water again, and gently firm the soil down. Shovel a ring of soil around the drip line. This forms a water-retaining well that pools water and funnels it to the plant's roots. Remove the well before hard frost or during heavy rains.
Trees require an additional Step. Many trees suffer root damage due to the effects of wind-rock. Winds rattle the tree, shaking it clear down to its unestablished roots. The motion tears tiny feeder roots, creates air pockets, and may prevent the tree from thriving. Place stakes or guy wires to keep the trunk in place while the roots gain strength. Don't make the common mistake of tying the tree down tightly. Tree roots need a little natural stress in order to grow strong. Make sure there is a little give in the tension of wires, or use a section of old rubber hose to tie the tree in place.
 Some of the best bargains in woody plants are bare-root plants. The selection is phenomenal, and it includes roses, grapes, blueberry bushes, canefruit, and many shrubs and trees.
 Container plants, similar to bedding plants, have their roots established in a growing medium. Unlike spring bedding plants though, it is best to transplant container plants when doRmant.