Monday, December 29, 2008
The time of the season: Looking at early and late bloomers
Many bulbs bloom in springtime — those bulbs are the most familiar and beloved to gardeners in cold-winter climates. However, fewer but no-lesspretty ones make their show in summer or even fall. See the next section for examples of these types of bulbs.
The terms early, mid-season, and late abound in bulb descriptions. All this naming system means is that some bulbs burst forth earlier rather than later — all during the springtime. A month or more of time can separate the first snowdrop from the first tulip or the first tulip from the last tulip. The expected bloom time is worth knowing so you can plan for continuous color or set up nice color duos or spectacular full-bed shows. The reason people plant most spring-blooming bulbs in the fall is not just so the plants can get a head start on root growth. These bulbs also need a period of cold (so obligingly supplied by a winter in the ground) to maintain their biological clocks. The warmer, thawed-out but moist soil of spring, not to mention the warm sun above, coaxes them at last to burst into their full and glorious potential. In mild-winter regions, gardeners can buy some bulbs pre-chilled (these plants have a limited selection compared to all the springbloomers), or gardeners can refrigerate regular bulbs for a specified period (at least eight weeks) and then plant them in late winter or early spring.
Defining terms: Bulbs aren’t always, well, bulbs
When you shop for garden bulbs, you may immediately notice some variations on the underground-storage theme. The minor but key differences are worth knowing because they affect not only what sort of plants the bulbs produce but also how to divide them to get more plants. Here’s a rundown of some of the plant structures that gardeners call bulbs:
- True bulbs: Bulbs are composed of concentric fleshy scales, or layers, which are actually modified leaves. Yes, just like an onion. At the base of a true bulb is a basal plate, the place from which the roots grow. Examples of true bulbs include allium (flowering onion), amaryllis, daffodil, hyacinth, and tulip. Interestingly, when you cut a bulb in half, you can see the future plant parts — stem, leaves, flowers. Offsets that you can pry off and plant may appear. In some cases, notably with lilies, you can grow new plants from individual scales.
- Corms: These structures resemble true bulbs somewhat, with a growing point on top and a basal plate at the bottom. However, they don’t have the clasping modified leaves; technically, corms are swollen underground stems. Also, they use up their store of food in one growing season — though new little cormels (baby corms) often appear atop the old one to carry on. Examples include autumn crocus, crocus, crocosmia, freesia, and gladiolus.
- Rhizomes: Rhizomes are thickened stems that grow horizontally; the roots grow down from the underside. The tip tends to have a primary growing point, though productive side-buds are common, and you can cut them off and plant the buds individually. Examples of rhizomes include agapanthus, bearded iris and many other irises, canna, and lily-of-the-valley.
- Tubers: Tubers are swollen stem bases. Roots grow from their sides as well as their bases, and you may see multiple productive buds. A classic example of a tuber is the potato. Other examples include most anemone, tuberous begonia, caladium, cyclamen, dahlia, and gloxinia. The way to divide tubers varies by the type — dahlias, cyclamen, and gloxinia involve different methods. Generally, you want to cut the tuber so that each piece contains a bud.
- Tuberous roots: These structures are in fact roots, not modified stems. Fibrous roots, like fingers, radiate outward from a central point. You can easily divide these roots to get more plants, making sure, of course, that each piece has at least one bud on it. Examples include alstromeria, clivia, eremurus, and ranunculus. Many gardeners discuss the differences between hardy bulbs and tender bulbs. Unfortunately, making the distinction isn’t easy, because a tender bulb in one climate (like Zone 4) may be a hardy one in Zone 7. Generally, hardy bulbs can survive wintering in the ground without too much trouble, whereas tender bulbs have to be dug up and stored. Your local nursery can help you determine which bulbs are considered hardy in your area.
Shedding Light on Bulbs
A bulb is a structure that grows underground; it stores food during its dormancy and then supplies energy for an emerging plant. You know what bulbs are if you buy onions or garlic at the grocery. Good ones are dense and have some heft to them, plus a thin papery skin for protection; as bulbs age, their robustness diminishes and they dry out. They sometimes begin to sprout the beginnings of green leaves out of their tops. Gardeners also consider foods like potatoes, sweet potatoes, ginger, and water chestnuts to be bulbs. Garden bulbs are actually much the same as the ones at the grocery. Good ones have some plumpness and density because they’re full of healthy, moisture-filled plant tissue. They really are a package of life! With the right conditions, and in time, they’re sure to generate leaves — and the big payoff, gorgeous flowers.
A slick trick for keeping out moles and voles
If you’re having problems with moles (or other small animals), try using this formula to drive them out of your yard:
- 1⁄4 cup castor oil
- 2 tablespoons liquid detergent soap
- 6 tablespoons water Blend the castor oil and soap together in a blender (they won’t mix properly otherwise).
When you’re ready to apply the solution to the area where the moles are active, mix 2 tablespoons of the solution into 1 gallon of water. Pour it into the problem area (all over the affected area, not just down the holes).
Dealing with perennial pests and diseases
Good news — perennials aren’t especially pest-prone. If they’re growing in an appropriate spot with elbow room and you water regularly, they’re in good shape. And healthy plants are your best defense against potential problems. There are but a handful of common perennial-garden pests. Read on for their descriptions and some ways to control them:
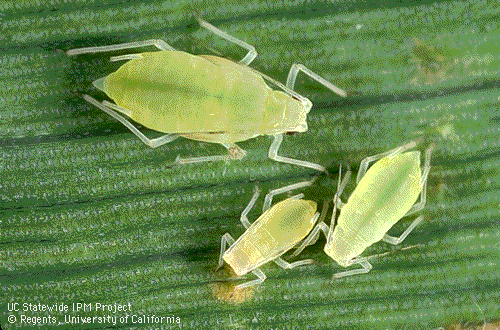
- Aphids: These small whitish critters congregate on stems and nodes, sucking the life out of your plants. A strong spray from the hose can dislodge them. Ladybugs can also make a quick meal of aphids, so don’t get rid of these helpers.
- Black vine weevils (snout beetles): In late spring and early summer, these critters are harmless pupae resting in your soil. Then the adults emerge and eat the foliage of dozens of perennials (and lay eggs for the next generation while they’re at it). The telltale sign is notched leaf edges, especially lower down on the plant where the insects find more shelter. Starting in early fall, the newly hatched grubs eat roots. Launch your counterattack in fall by releasing beneficial nematodes (roundworms), available from well-stocked garden centers and mailorder sources; apply according to label directions. Other pesticides are registered for controlling these creatures; check with you local Cooperative Extension Service agent for more information.
- Leaf miners: These bugs form brown or tan or clear traceries — tunnels or channels — on affected leaves but rarely kill the plant. Just remove and discard affected leaves, and the plant will generate new ones.
- Root nematodes (roundworms): Affected plants develop severely distorted growth. Rip the plants out and discard them before the problem spreads.
- Voles: These little rodents slip out of their underground tunnels when you’re not looking and nibble on your perennials, especially the leaves but also roots, seeds, and bulbs. They’re a bit larger than mice, with a shorter tail and smaller ears. You can try trapping them with a baited mousetrap, but the best deterrent is a cat who’s a good hunter. Castor oil as a repellent works fairly well. You can also surround plants with small moats of sharp gravel.
If fungal problems are chronic in your garden, your best line of defense is good air circulation, particularly in hot, humid summer weather. Also, be sure to pick off and discard sick leaves or clean up fallen affected leaves around the base of your plants. Regular, even watering right at the roots (that is, not splashing the leaves) is also wise.
Of course, an easy way to avoid both pests and diseases is not to grow vulnerable plants! You can deliberately seek out varieties touted as resistant.
Saturday, December 13, 2008
Preparing perennials for winter
If you live in a cold are and want to overwinter your tender perennials, simply dig up the roots or entire plant and bring it indoors to a nonfreezing spot to spend a few months as a dormant or semi-dormant houseplant. Pot the plants in any good soil and grow them in a cool (40–50°F) and bright area. Keep them barely moist. The idea here is to just keep them alive until you can plant them back outside after the danger of frost next spring. Then with warmer temperatures and brighter light, they’ll spring back to life. You can also trim and prune down your perennials and use mulch to protect them through the winter.
Off with its head! Deadheading your plant
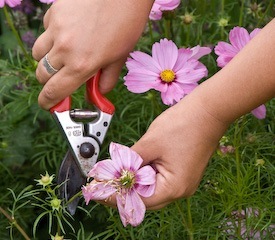
Deadheading is just a gardening term that refers to the practice of removing spent flowers or flower heads. Not only does it leave your perennials looking nicer, but it also encourages more blooms. Deadheading works by thwarting the plant’s natural inclination to go from flower to seed and thus finish up for the year. If you deadhead, the chemical messages that put that process in motion are stopped and the plant redirects its energies into making more buds and thus more flowers. You can keep a perennial in bloom a lot longer by doing this. So make a habit of deadheading your perennials every time you walk by. Toss the faded flowers on the compost pile. Or bring your clippers along and cut bouquets while the flowers are still in their prime — cutting fresh flowers has the same effect as later deadheading!
Supporting with stakes or rings
Because some perennials are tall, or tall and broad, a little support is a good thing. It not only keeps the plant more in bounds and manageable, but it also prevents the plant from keeling over under its own weight. You’ve been waiting for those flowers — don’t let them cast downward or flop on the ground! Using a stouter or larger support than you think you need never hurts — if your perennials are healthy and happy, they’re probably going to need it. Resourceful gardeners like to rig their own plant supports, and certainly, nothing’s wrong with bending some old coat hangers or recycling sticks and stakes of various kinds, including tree branches or twigs. But your local garden center, home store, or favorite mail-order catalog may well have a perfectly affordable alternative , saving you the time and effort.
Here are a few important tips to remember about using perennial supports:
- Install early. Press a peony hoop (a ring on legs that’s useful for many more perennials than just peonies) over the plant well before it reaches the hoop’s height. This way, you can center the support right over the plant, and when the perennial does grow as expected, the stems, leaves, and flowers will froth over the hoop and hide it from view — without a struggle. Early installation also reduces the risk of damaging the root system as you poke the support in.
- Press the support in deeply. At first, the support may be equal to the job, but as the plant grows ever-larger, the stake or hoop may lean or slump. Anchoring the support deeply at the outset can make the support more stable and stronger. A foot or more into the ground is usually best, depending on the plant.
- Help out with ties. As the plant grows, check on it and fasten the stem or stems to the support at regular intervals. To avoid abrading the plant tissue, use soft material (not wire! Try string or cloth); if you loop it once around the stem and create a second loop for attaching to the support, the plant will be able to move in a breeze but still be held gently but firmly to its appointed place. (Use green string or cloth, and you’ll hardly be able to see it.)
- Be tidy! Remove and store or discard the support at season’s end. This step will also remind you to cut back the perennial (and mulch if your winters are cold). With a season’s experience under your belt, you should now know whether the support is the right one for the job and thus worth saving or replacing. If you need something more substantial, add it to your springtime shopping list.
Preparing for the actual Perennial Planting
How to plant your perennials has a lot to do with how you acquired them, whether by mail-order, from the local nursery, or as a division from a fellow gardener.
If you purchased your plants mail-order as pots or bare roots, here’s what to do when they’re delivered to your home:
- Unpack immediately, and inspect the plants. As with potted ones, you want to be on the lookout for obvious problems of pests or rot. And you want to see crisp roots. You shouldn’t see any green stem or leaf growth yet, or at least not much.
- Hold the plants in a cool, dark place until you’re ready to plant them — perhaps for a few days or a week at the most. The refrigerator is also fine. Mist them lightly if they seem dry. If you can’t plant right away, pot them, water well, and care for them in a sheltered location.
- On planting day, rehydrate the roots by soaking them in a bucket of tepid water for a few hours.
- Keep plant divisions moist. Don’t let them dry out! This idea is especially important if you’re not prepared to plant the divisions in your garden right away. Place them in a plastic bag or box and sprinkle on some water or temporarily pot them; water well.
- Clean them up. Clip off or tug out weeds and limp, yellowing, or damaged foliage. Cut off flowering stalks (don’t worry, they’ll generate new ones soon enough). Right now, you just want to the divisions to devote their energy to establishing their roots in your yard.
- Plant in a prepared area and keep an eye on them. Don’t just toss divisions on the ground and hope for the best, even if your friend characterized them as tough guys. They need time, water, and weeding to get their legs under them.
Fall planting for Perennials
Autumn turns out to be a fine time to plant many perennials in temperate climates. The soil and air are cooler now and sunlight is less intense, so the weather’s less stressful for newcomer plants. Competition from weeds isn’t likely to be a big problem, either.
In some regions, rainfall becomes more regular, too, which helps provide the moisture the perennials need to start good root growth. And their roots do grow — the plants simply aren’t programmed to start producing lots of new leaves or flowers at this time of year. Yes, the perennials will soon head into winter dormancy, but fall planting often gives these perennials a head start over their spring-planted counterparts.
When spring rolls around, you may notice the difference. The fall-planted perennials should be raring to grow, larger and more robust. You can expect a good show. All this, plus you won’t have to elbow through crowds at the garden center. You now know something that many gardeners don’t. Seize this opportunity!
Fall planting also applies to perennials you want to dig up and move to a new spot and to divisions (strong, rooted pieces of overgrown plants).
When getting ready for fall planting, make sure you do the following:
- Buy good, strong plants. These plants have the best chance to establish themselves in your garden.
- Mulch a little at planting time, about 1⁄2 to 1 inch, to hold in soil moisture and warmth; mulch even more as winter arrives, another 2 or 3 inches after the ground freezes, to protect the plants during the cold months.
- Cut back the top growth, just to further urge the plant to concentrate on root growth.
Here are some things to avoid during fall planting:
- Fertilizing: Fertilizing inspires a fresh spurt of young shoots and leaves, which are vulnerable to cold damage. You want perennials to enter their winter dormancy.
- Plant late-bloomers: Late bloomers (like asters, mums, black-eyed Susan, and perennial ornamental grasses) are better planted in spring.
Make doubly sure, before you find out the hard way, which plants relish fall planting and which do not. You can always double check at wherever you buy perennials in the fall. Reputable nurseries don’t sell plants that resent being planted this time of year. Some fall-planting favorites are daylilies, peonies, oriental poppies, and rhizomatous iris.
Saturday, November 29, 2008
Spring planting for perennials
Springtime is the preferred time to plant perennials for good reason. All the conditions these plants relish and respond to are in place: warming soil, warm sunshine, longer days, moist ground, and regular rainfall. Roots quest into the ground, taking up water and nutrients to fuel growth, and top growth — foliage, stems, and flowers — surges forth.
When getting ready for spring planting, make sure you do the following:
- Harden the plants off. Just like you wouldn’t plunk a new goldfish into its tank without letting it adjust to the temperature, you don’t want to give your perennials an environmental shock. Let new plants adjust to life outdoors for a few days or a week by sitting them in a sheltered spot, such as on the porch or against the semi-shady side of the house. Start the plants off for just a few hours, and increase the time until they’re outdoors 24/7. (But bring perennials indoors or cover them if there’s a threat of a late frost.) Cover them with single layer of newspaper to reduce the light intensity and wind exposure.
- Choose a cool, cloudy, or damp day to plant, or plant in late afternoon. The hottest part of the day (midday to early afternoon) is a bit stressful to both you and the plants!
- Plant in good soil, create a basin of soil or mulch around each plant, and give a good, soaking watering. Check that the water drains in where you want it.
- Mulch after planting. Not only does this step hold in soil moisture and moderate the effects of fickle, fluctuating spring temperatures, but it also keeps weeds at bay (they love to grow this time of year, too).
- Handle the plants roughly.
- Plunk a root-bound plant into the ground. Either tease apart the roots a bit or lightly score the sides with a sharp knife, which inspires new root growth. Then you may place the perennial in its planting hole.
- Plant perennials in waterlogged ground, or drench them right after planting. A moderate dose of water is a needed drink; too much water prohibits oxygen from getting to the roots, and the plants literally drown or rot.
Deciding when to plant perennials
Perennials tend to be rather tough and forgiving plants in terms of picking the right time to plant them, but generally, most people plant perennials in either the spring or the fall.
Perhaps the best way to know when to plant perennials is to know when not
to plant them. For example, avoid planting perennials in stressful conditions,
or you will, as the saying goes, reap what you sow. No-no times include
- Any blazing hot day
- Any time of drought
- Any time when frost is predicted
- Any time when the ground is soggy or still frozen
- Right after a deluging storm or flood Read on for some seasonal planting advice.
Planting Perennials on Clay soil: Soggy soil at its worst
If your yard has clay soil, you already know it. Slick and soggy in wet weather and nearly impenetrable in dry, clay soil is actually composed of lots of densely packed, very tiny particles. Clay leaves little space for air and water to circulate, and the result is heavy ground that drains poorly. Needless to say, many perennials — or rather, their roots — have a hard go of it in such conditions (and so does your shovel or trowel, for that matter). Clay soil does have some advantages, believe it or not. It’s often fairly fertile because it holds nutrients and water so well. And of course, it’s slower to dry out in hot weather, which can help your plants.
At any rate, if clay is your lot in life, you have three options:
- Improve the soil’s structure. Add organic matter. Doing so can help lighten and aerate the area, making it more hospitable to perennials and other plants and allowing water to drain away better. Dig organic matter in often and deeply — compost and/or well-rotted manure are up to the job.
- Go with what you have. Plant clay-tolerant perennials, such as beebalm, cardinal flower, chrysogonum, epimedium, many ferns, galax, gunnera, Japanese iris, Japanese primrose, marsh marigold, or myosotis.
- Bypass it. Grow your perennials in raised beds or pots.
Planting perennial on wet soil
Soggy, boggy ground is usually written off as a lost area or liability. But what if that damp side yard, wet back forty, or perpetually muddy roadside ditch were to come alive with handsome leaves and blooming color? It’s certainly possible. A host of plants actually like wet feet; a little research can point you to the ones that are a match for your problem-spot’s conditions. You may have to wade in prior to planting and get the spot ready. Bring your rubber boots and create a hospitable open area with gusto and determination! Yank out most or all the existing vegetation so it doesn’t compete with the desirable incoming perennials. If warranted and practical, dig a drainage trench to route excess water away from the spot. Perhaps dig in some organic matter to improve soil fertility and drainage, if only a little.
After you’ve planted the area with appropriate moisture-loving perennials, not much more should be required. The plants’ basic need — water — is already present. If the plants are happy, they’ll increase over time, reducing the need for weeding or indeed, any intervention on your part. If they grow too lushly, why, you can rip out and discard or give away the extra plants. Cardinal flower, daylilies, forget-me-not, Japanese primrose, marsh marigold, and turtlehead are good plants for wet soil. Don’t apologize for the wet soil:
Go ahead, call it a bog garden! And if you’re ambitious, make the boggy area the entry to a new water garden
Planting perennials on dry soil
If sandy, gritty, or fast-draining soil is your lot, a fabulous perennial garden is still possible. Save yourself a lot of blood, sweat, and tears by working with what you have. Sure, digging in some organic matter at planting time (and on an annual basis) is good advice that you should follow when you can, but your gardening life can be a lot easier if you go native. You don’t have to pour on water you don’t have, and you may be delighted with the easy maintenance and attractive look.
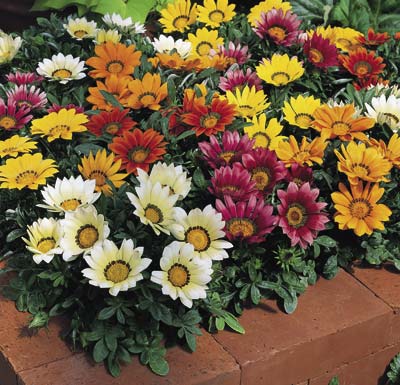
That’s right: Go native. Perennials native to dry ground are your best bet. Before you protest that they aren’t attractive or are probably weeds, take a fresh look. Peruse the offerings at a local nursery that specializes in indigenous plants. Visit a public garden or botanic garden with displays of natives. Your eyes will be opened. Botanists and horticulturists feel your pain and have been working hard over the years to find out which ones adapt best to gardens and which ones are prettiest. There are even selections or cultivated varieties (cultivars) that are significant improvements over their wild parents — new flower colors and bigger, longer-lasting flowers on more-compact, handsome plants. Favorite dry-soil perennials include black-eyed Susan, blanket flower, baptisia, butterflyweed, evening primrose, gaura, penstemon, phormium (a tender perennial in most regions), and yarrow. And don’t overlook cacti and succulents — a well-stocked local or mail-order nursery can convince of their astounding range and beauty.
Wednesday, November 12, 2008
Planting Perennials in Shady Spots
Judging from many gardening books and magazines, a beautiful garden is full of sunshine and flowers, and those of us with shade are doomed to a dull and boring display. Not so! Many perennials prefer shade, prospering in a range of conditions ranging from deepest woodland gloom to areas of dappled or filtered light to those that get morning sun and afternoon shade. Not only that, but many plants appropriate for shade have beautiful leaves —you can find amazing variety in shape, texture, and even color. And you may be pleasantly surprised to hear that plenty of shade plants produce attractive flowers.
Shade is actually a benefit to many plants. Lack of direct sun means their leaves look healthy and lush, without burned edges or tips, without drying out or wilting. Sunlight also tends to bleach out the beauty of variegated leaves (leaves that are marked or rimmed in white, cream, or gold), whereas in shade, such foliage thrives and lights up the scene. Shelter from the sun’s hot rays also preserves flower color.
Favorite shade perennials include ajuga, astilbe, bergenia, bleeding heart, brunnera, coral bells, corydalis, many ferns, goatsbeard, hellebore, hosta, lady’s mantle, lamium, lily-of-the-valley, lungwort, Solomon’s seal, and sweet woodruff.
Planting Perennials in Sunny Locations
Lots of perennials adore sunshine. They grow more compactly when they get enough sun (as opposed to becoming lanky or leaning towards the light source), and they produce more and better flowers. Full sun means six or more hours per day. If you have to choose between a spot with morning sun and a spot with afternoon sun, most sun-loving perennials seem to do better with the afternoon site. This situation varies somewhat on your climate. If you live in the deep South, a plant that grows best in full sun in a Northern climate may perform better in a spot protected from hot, late afternoon sun.
Because sun can be drying, either choose dryland natives or help out the plants with regular watering and a moisture-conserving mulch around their root systems.
Favorite sun perennials include artemisia, armeria, basket-of-gold, blanket flower, coneflower, coreopsis, delphinium, gaura, lavender, penstemon, peony, sea holly, and yarrow.
Planting Perennials
Perennials are probably the hottest topic these days among garden enthusiasts and plant suppliers. As a result, information about how to select and plant them abounds. Reputable garden centers have knowledgeable salespeople, and universities, garden centers, and public libraries sponsor various workshops and lecture programs about them. If you need more information than you find in the sections ahead, check out these sources and the books in your public library or local bookstore.
Good news — there’s a perennial for almost any growing situation your yard can dish up. Make a match between the conditions you have to offer and the known characteristics of a plant, and you’re halfway there. A little care from you on planting day and beyond, and your perennials are sure to thrive.
Their roots are showing: Dormant, bareroot perennials
Bareroot perennials are the typical mail-order product. Selling perennials this way is simply more practical for some plants for a variety of reasons. For instance, baby’s breath and baptisia have root systems that are sensitive to being moved in and out of the ground and various pots too many times. Other perennials, like daylilies and peonies, have large roots systems that don’t fit well in smaller pots. These bareroot plants are also dormant and lightweight, which makes shipping cheaper and less risky. Like potted mail-order plants, bareroot ones are usually 2-year-old, field harvested plants. They were probably dug up the previous fall, just as they became dormant, and kept in climate-controlled cold storage until spring shipping season. Bareroot plants consist of a hearty root system and some trimmed-down stems; little or no leaf growth should be evident.
Potted plants, ready for action
Some mail-order nurseries ship small perennials in small pots. If you get a live-plant shipment, open it immediately upon arrival, even if you’re not going to plant anything that very day. Inspect the plants as I describe in the preceding section, and quarantine any plants of questionable quality. Call the nursery immediately if you see a problem so you can work out a refund, merchandise credit, or replacement.
Small potted plants aren’t necessarily baby perennials. Such young plants take too long to grow, and mail-order nurseries want you to jump right in and enjoy your garden. So the small plants nurseries ship out tend to be 2-yearold, field-grown plants that have simply had a “haircut” of the top growth prior to shipping. A good, strong root system is just what you want. Don’t worry: Fresh, new top growth will soon follow!
Tuesday, October 28, 2008
Buying perennials through mail-order
Buying through mail-order can be very convenient. You can shop from a catalog or on a Web site in the dead of winter or in the middle of the night in your jammies. Also, you can spend plenty of time thinking over your plans. After all, mail-order companies often carry a broader range of varieties than local providers do. And after you order your plants, you get them delivered to your door at the right time to be planted — all without standing in line!
Just make sure you pick out a company that’s been in business for a while, that’s able to answer your phone or e-mail questions, and that your gardening friends have had good experiences with.
Getting perennials in containers
You can usually purchase partially grown perennial in pots, and they come in a variety of pot sizes, from a mere 2 inches on up to 5 gallons. Both mailorder nurseries and local retailers sell perennials in. The larger the plant is, the more mature — and expensive — it is, and the more immediate your gratification; however, a smaller plant can catch up quickly if you plant it in an appropriate site and give it good care. Consider also how big of a hole you want to dig. Here are some important ideas to remember so you can be sure of getting a good potted plant:
- Buy a healthy plant. Examine the entire plant:
- Look above and below the leaves as well as along the stems for signs of insect or disease damage. A few yellowing leaves are fine.
- Examine the crown for signs of rot (no good, obviously) and fresh new shoots (very good).
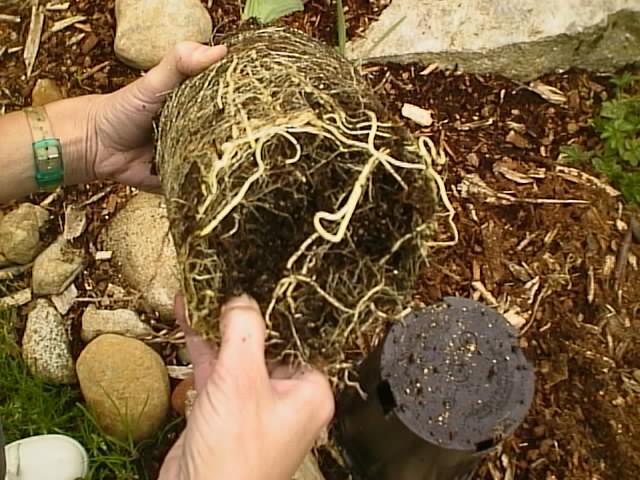
- Pop the plant out of its pot and examine the roots. They should be crisp and viable, often white or brown, not wiry, wry, limp, or black. Avoid pot-bound plants.
- Choose a plant that’s not yet in bloom. Some growers force plants into early bloom so they’ll look good at the stores, but don’t be seduced! The trip home in your car or adjusting to the transplanting process often causes blossoming perennials to jettison expendable growth; in other words, they ditch petals and unfurling buds. If your new plant sheds its flowers on the way home, make sure you plant the perennial well and care for it; it may bloom again soon enough. However, many perennials don’t rebloom, so the show may be over until next year. You’re best off choosing a plant that’s conserving its energy.
- Don’t buy out of season. Bargain perennials aren’t always a bargain. Those plants for sale in midsummer have a stressful time of establishing themselves; fall-planted ones may do just fine or may succumb to winter’s cold.
- Have a few alternatives in mind. You can’t always get what you want, but with all your options, you should be able to find something that works.
Choosing plants for perennial garden
After you have your layout planned, you’re ready to begin your plant selection. In addition to choosing plants for the bloom times and colors, take these points into consideration when choosing your plants:
- Consider height and width. Perennial gardeners have to be patient and be able to imagine the future because new plants are small. Find out your chosen plants’ expected mature sizes and allow them enough elbow room in your plan. Plan to position taller-growing plants to the back of a traditional border or the center of an island bed; array lower growers at their feet. If you need help visualizing, some software programs let you see what your garden will look like as plants mature.
- Mix it up. Nature loves diversity, and the variety looks great — it keeps the eye moving even as it lets individual plants stand out. So intersperse a variety of plant forms, from spiky ones to mound-formers.
- Match the plant to the growing conditions. Save yourself a lot of grief and wasted money and effort by choosing plants that are clearly labeled as sun-lovers or shade-lovers, as the case may be in your intended site.
Designing perennial beds and borders
The most common way to display perennials is together, in a large flowerbed or, space permitting, a long border of either meandering form or with firm boundaries. Quite honestly, these methods of growing perennials are purely practical: You can prepare the soil, plant them together, and care for them together
Here are some basic layout tips and techniques that the professional garden designers use, easily transferred to your own garden:
- Plan to be in scale. Some sense of proportion between your home, garage, and/or shed (whatever’s nearest to the proposed perennial garden) is key. A big house, for instance, does best with wider beds and taller plants; a smaller one is better served by a series of smaller beds and lower-growing plants.
- Match garden style with structures. A casual bungalow, cottage, or onelevel home likes an informal perennial garden, with wavy-edged boundaries; a larger or more imposing home, or one with strong architectural elements and lines, needs a more formal, straighter-edged approach.
- Try a dress rehearsal: Lay out the lines of your proposed garden in advance with a hose, outdoor electrical cord, rope, or even chalk or flour.
Set potted plants or lawn chairs or whatever here and there within its bounds as stand-ins (these items should match the perennials in terms of mature height and bulk, not the size of the plants you buy); stand back and assess. Tinker with the plan until you’re satisfied, and then sketch it on paper so you can remember it on planting day.
Choreography: Timing the perennial blooming
Although some perennials bloom all summer long, just like your favorite annuals, others do not. They have a period of glory that peaks for a week or several weeks, and then the show subsides.
Gardeners have lots of ways to find out in advance when a perennial will bloom and for approximately how long. Look it up in a gardening reference book. Do research on the Internet. Check a print or online gardening catalog (bearing in mind, however, that some merchants may exaggerate!). Look on the tag or label. Ask a garden-center staffer or someone who’s a member of a gardening club. Best of all, ask someone in your area who’s already growing your perennial of choice, because performance varies by climate and even soil conditions.
Nature being as flexible and fickle as it sometimes is, your show may run longer or shorter than you originally planned, or you may end up with some overlap. However, coordinating plants to share the stage at approximately the same time works. You can fine-tune later, after you’ve basked in your early successes.
Long-Term Strategy for Your Perennial Garden
So many great perennials, so much variety is available that one of the great joys — and challenges — of growing them is combining different kinds of perennials in plantings. But because different perennials bloom at different times, and because of the relatively slow growth of perennials (compared to annuals), perennial gardening usually involves some advance planning so you can get the most bang for your buck and get the exciting look you want, when you want it.
Don’t be intimidated. If you’re displeased with a result, you’re still in better shape than a painter. Instead of throwing out the canvas, you can simply pull out or move a plant and even replace it with something else until the result looks great. And while you’re waiting for perennials to take hold, you can fill in the bare spots with some annuals or bulbs. That said, perennial gardening doesn’t have to be a hit-or-miss operation.
You can gather information from others, using their knowledge and ideas. Copy or approximate what you like, or borrow a good idea as a jumping off point. Inspiration is all around you — in books, gardening magazines, and other gardens, both public and private. Above all, have fun! Perennial gardening is a very enjoyable hobby, with a broad and forgiving learning curve.
Wednesday, October 15, 2008
Tender perennials
Contrary to popular belief, the upper parts of the Northern Hemisphere don’t have the corner on perennials. Lots of plants from milder climes (say, USDA Zones 8, 9, 10, and warmer, right on into the tropics) meet the perennial description. These repeat performers burst forth in warm spring weather, enjoy the summer months, and slow down or die down in the fall, roots still very much alive. They return in glory when the year cycles around to springtime again.
Obviously, you can grow tender perennials with impunity if you’re in a mildclimate area. However, everyone else can enjoy them, too: Gardeners just have to get the tender treasures through winter, because these plants can’t tolerate or survive cold temperatures. Or certainly, you can leave your tender perennials in the garden to perish over the winter — which makes them, essentially, annuals and means you may ending up buying new ones next spring.
Popular examples of tender perennials include angelonia, coleus, gerbera, impatiens, and pentas.
Hardy perennials
The broad group of hardy perennials is justly popular in colder climates (they’re generally appropriate for gardens in USDA Zones 3). These plants emerge each spring, producing foliage and flowers. Come fall, their top growth dies down and the show is over for the year. But the roots live on underground, waiting to revive and do it all again when warm weather returns.
Popular examples of hardy perennials include aster, columbine, coneflower, daylily, delphinium, mums, penstemon, peony, phlox, and Shasta daisy
Looking at Perennials, the Repeat Performers
The broadest definition of a perennial plant simply states that it’s a herbaceous, or non-woody, plant — as opposed to, say, a shrub or tree —that last a couple years or more. Perennials, like lilies and daffodils, can be bulbs. Herbaceous perennials are plants that have foliage that dies back to the ground, and new foliage and shoots sprout from their overwintering roots next spring. Perennial plants are a wonderfully varied group, quite possibly the most varied group a gardener can work with. No matter where you live and what your growing conditions are (climate, soil type, sun or shade), you have plenty of plants to choose from. So which perennials should you include in your garden? Start off by knowing which general group can work best for you: hardy perennials or tender perennials.
Sunday, September 21, 2008
Guide for Planting Perennials
Perennials are flowering plants that are meant to last — several years, at least, and sometimes much longer. So ideally, they’re a wise and practical “one-time investment,” unlike the annuals you have to buy and replant every year; therein lies their great appeal and value.
Yes, you may have detected a note of hedging. Perhaps you’ve even heard the old gardener’s joke: “A perennial is a plant that had it lived, would’ve bloomed year after year.” After you go to the effort of acquainting yourself with handsome perennials and bringing them home, you sure don’t want them to totally miss the boat and turn out to be expensive annuals!
Don’t worry. Get your perennials off on the right foot and give them the care they need to thrive (it’s perfectly easy), and you won’t be disappointed; you’ll be thrilled.
Japanese beetles and Spider mites
Japanese beetles
If you live east of the Mississippi, you’ve probably seen Japanese beetles — they’re approximately fingernail-size and copper-colored, with green heads and legs. They eat all plant parts, though chewed-up leaves are their hallmark. Hand-pick Japanese beetles (a great money-making project for your kids!) and drown them in a bucket of soapy water.
Spider mites
You may not spot the actual culprits — spider mites are really tiny reddish, brownish or yellow spider-like pests — but you will see their webs on the leaves of your annuals. These pests are particularly prevalent when the weather is hot and the soil is dry. Combat them by picking off and destroy-ing affected foliage; rinsing or spraying surviving leaves; or spraying with insecticidal soap.
Dealing with Slugs and snails
Ravenous and disgusting creatures, slugs and snails can decimate your annual flowerbeds and even get into container displays. If you don’t catch these pests in the act, you’ll certainly spot their giveaway slime trails. These critters are mainly active at night and especially relish damp conditions.
Watering early in the day and spacing plants so they aren’t crowded may help, but sterner measures are necessary if you have many snails and slugs and they persist. You can set traps that you buy down at the garden center or set out pie trays of cheap beer. Alternatively, protect your plants with barriers of copper strips or sharp diatomaceous earth (fossilized algae — again, available where gardening supplies are sold) — slugs and snails won’t cross these. A relatively harmless pelletized form of iron phosphate sold as Sluggo is a safe and effective control.
Don’t pour salt on slugs; salt can damage your plants. Also, some slug and snail products, like metaldehyde and iron sulfate, can be poisonous to pets.
Opt for the safer controls first.
Monday, September 8, 2008
Dealing with Aphids and Cutworms
Aphids
Aphids come in all colors and are often prevalent, so people tend to worry about them too much. It’s easy enough to rub these plant-sucking insects out, literally, by squishing them with your fingers. Or hose them off with a strong spray of water. Some companies sell ladybugs as natural aphid controls, though ladybugs aren’t too dependable — keeping them in your yard is a challenge.
Cutworms
Cutworms are actually moth larvae. These little fellows rest in your garden soil by day and emerge at night to dine on your annuals, especially newly planted, juicy ones. A clever and safe control is to press a collar of cardboard (a sixounce tuna fish or cat food can works well as a template) around the plants. The collar should go 1 to 2 inches into the ground and 2 or 3 inches above ground level; the natural growth of your annuals may soon hide this barrier from view.
How to Groom Annuals?
Like any other garden plant, an annual looks better if you stop by every now and then and give it some personal attention — some grooming. Annuals soon replace pinched-off bedraggled leaves with new ones. Plant diseases and insects are harbored in wilted, browned, spotted, or yellowed leaves (indeed, pests and disease may have caused the damage). So always get rid of those unhealthy leaves when you see them, and don’t forget to scoop up any that have fallen at the base of your plants. Such tidiness can arrest a problem or even clear it up.
You can get more flowers through deadheading, or removing spent blossoms. Annuals aim to go to seed, and when you cut flowers for bouquets or remove spent blossoms, you’re thwarting this natural process. The plant responds by generating more buds and flowers. If you’re diligent, the plant may never get a chance to go to seed.
How to Mulching Annuals?
A layer of mulch 1 or 2 inches deep around the base of your annuals is a great idea. Mulch keeps encroaching weeds at bay and conserves soil moisture. Plus it looks nice! Favorite mulching materials include bark chips, shredded bark, straw, pine needles, grass clippings, and cocoa hulls. Keep the mulch at least an inch away from the stem of the plant to keep insects and disease from getting into the plant.
How Fertilizing Annuals?
Strictly speaking, fertilizing annuals isn’t necessary, but for best performance, it’s highly recommended. Remember, annuals are high-energy plants that respond impressively if you fertilize them regularly.
The effects of adding plant food can be dramatic but not instant. Keep an eye on your annuals for a week or two or even three before concluding that you’ve given them enough.
By and large, annuals lap up nutrients eagerly and use this extra nutrition to produce more and healthier growth and to bloom like gangbusters. So you’ll be amply rewarded for your efforts!
How to Water Annuals?
Sufficient water is always important for growing plants, but even more so for productive annuals; consider it fuel for the ongoing show. Moisture hydrates the roots, plumps up the leaves, makes buds swell and open, and sustains the flowers. Don’t allow your annuals to wilt before being revived or they’ll be stressed out and unable to perform their best. Regular watering is ideal. Keep the following in mind when setting up a watering schedule for your annuals:
- Spring watering: If your area gets normal, drenching spring rainfall, your newly transplanted-into-the-garden annuals may not need supplemental water from you. But remember how important early watering is — it encourages the roots to gain a foothold in their new home before the plant can properly turn its attention to growth and flowering. So water on day one and keep an eye on things in the ensuing days and weeks.
- Summer watering: Established annuals tend to be pretty tough and often forgive your watering lapses. But they’ll certainly be healthier and look much better if you give them water at regular intervals and nurture them through periods of drought.
- Fall watering: In some areas, rainfall may take care of your annuals at this time of year. But if not, continue to water as needed so your annuals look terrific right up to the finish line (the first frost). Your best watering methods depend on how many annuals you have and how close together they are. Options range from a gentle spray from a watering can to soaker hoses to a sprinkler. Watering in the morning hours is best so the water can soak in and hydrate the annuals through the hot midday.
Getting annuals in the ground
Annuals are simple to plant. Just follow the label directions for spacing, and dig a hole deeper and wider than the root ball. Add some compost to the hole or mix the native soil with organic matter. If desired, you can add some dry fertilizer in the planting hole and water it in, or you can fertilize the annual after .
Annuals are most frequently sold in market packs, in which six or so plants are each in separate cells. Merely turn the pack upside down and gently push each plant out of its cell from the bottom. Don’t pull them out from the top because the stem may break off from the roots. After removing the plants from the packet, plant them in the ground so that their rooting mass is slightly below the soil surface. Firm the soil around the plants and then water them in well.
Monday, August 25, 2008
Deciding where to plant annuals
By and large, annuals are resilient plants that tolerate a wide range of growing conditions. But some have preferences for more or less sun, and these specialists allow you to dress up such areas for maximum impact.
Planting in the sun
Full-on, warm sunshine inspires many annuals to grow robustly and generate loads of flowers. You can always tell if a sun-loving annual isn’t getting enough light, because its stems become leggy and lean toward the light source, and flower production is disappointing. So let them have it! How much is enough? Six to eight hours a day suits most. My favorite annuals for sun include cosmos, nasturtiums, zinnias, marigolds, and cornflower.
Planting in the shade
Banish gloom in your yard’s dim and tree-shaded areas with shade-loving annuals. Plenty do just fine in shade. Indeed, their flowers last longer without the stress of the sun beating down on them. White and yellow flowers really add sparkle, individually or massed. My favorite annuals for shade include tuberous and fibrous begonias, impatiens, and torenia. If your shade areas have poor soil or are laced with tree and shrub roots, don’t despair. Instead, just display the plants in pots, setting them here and there or in clusters. Or dig holes in the ground and stick the plants — pots and all — in the hole. Doing so makes changing them out easy, too. (A clever idea: Hook hanging baskets over tree branches and fill them with shadetolerant annuals.)
Planting annuals later in the season
Of course you can plant later in the season! Plant and replant all summer long if you want and into fall if you garden in a mild climate. As long as the plants are willing and able to grow and produce flowers, why not? Because blazing hot weather is stressful, avoid planting during such spells or at least coddle the newcomers with plentiful water and some sheltering shade until they get established. A dose of all-purpose fertilizer (applied according to the instructions and rates on the container) may also hasten latecomers along.
Planting in late spring
The majority of annuals are frost-sensitive. In other words, a freeze can damage or kill them. Frigid temperatures also make annuals much more susceptible to disease damage. If these small plants are damaged by cold, they may never quite recover. Don’t risk it: Plant your new annuals in the ground only after all danger of frost is past. The same goes for plants you’re putting in containers (though you can bring the pots indoors on chilly nights if you have to).
Gardening fever hits us all on the first warm spring day. But warm air isn’t necessarily what you’re waiting for — warm soil is. If the ground is still semifrozen or soggy from thawing cycles or drenching spring rains, it’s better to wait another week or two. No, you don’t have to take the soil’s temperature before proceeding. Just remember the wise advice of garden author Roger Swain: Don’t put plants in a bed you yourself wouldn’t be willing to lie on!
Filling in the garden after the last frost
If you live in an area with a long growing season, you can go ahead and sow annual seeds straight into the ground, secure in the knowledge that they’ll sprout, grow up, and start pumping out flowers, all in plenty of time. This approach is generally easy and cheap. Gardeners with shorter summers can either start seeds inside or buy seedlings.
Freezing weather kills or at least severely damages most annuals. Therefore, the trick is to know your last spring frost date and your first fall frost date —these dates bookend the annual-gardening year. (If you don’t know, ask an employee at a local garden center, a more experienced gardener, or someone at the nearest office of the Cooperative Extension service. Note that the dates are averages; they can vary somewhat from one year to the next.)
Starting with nursery, well, starts
You generally see nursery starts at the garden center or home store in mid-to late spring. Small annual plants are generally sold in six-packs or larger, with each cell holding a single young plant. These plants were raised from seed or from cuttings in a greenhouse and need a little TLC (shelter from cold and wind, regular water so they don’t dry out) when you get them home.
Here’s what to check before buying:
- Labels: Labels should contain useful information, such as flower color and mature plant size, as well as the name of the plant.
- Blooms: A blooming plant may be more attractive, and it lets you check that the color is what you want, but the flowers take energy away from the roots. When you get the plant home, cut or pick off any flowers or buds.
- Well-rooted plants: Pop or wiggle a plant out and check the rooting. If the seedling promptly falls out of the soil mix, it hasn’t been in the cell or pot long enough. If you see a mass of white roots, the plant has been in the cell too long and is stressed.
- Healthy appearance: Is the foliage crisp and green? Just a few yellowing and bedraggled leaves aren’t necessarily a problem — you can pinch those off. But you should look in the crown and the nodes (where the leaves or leaf stalks meet the main stem) for insect pests or signs of them.
Sunday, August 10, 2008
How to start with annuals seed packets?
The almighty seed is the symbol of a new beginning. Buying your annuals as seed packets gives you four important advantages:
- You can get an earlier start. Starting seeds indoors takes time and space, but it’s not at all difficult — and it’s a great way to chase away the winter blues.
- Thanks to a broader selection in the seed-packet world, you can grow unusual annuals or new and different colors of popular ones. Look in seed catalogs that come in late winter, or browse the company Web sites. You have all sorts of wonderful choices!
- Quantity! Any given seed packet can contain 100 or more seeds. Even with some attrition, using seed packets is a great way to grow a whole lot of plants.
- It’s inexpensive. Sure, experienced gardeners bemoan the rising cost of seeds over the years, but, really, it’s still the best deal in town, always substantially cheaper than buying young plants.
Be sure to shop early for best selection, and always check the packet to make sure the seeds are fresh. (The packets should be stamped with an expiration date of later this year or next year or should say “packed for [current year] Store the packets in a cool, dry place so the seeds aren’t tempted to germinate until you’re ready to sow them in flats.
Combining annuals colors
As a painter or interior decorator may say, with justifiable envy, “Wow, what a palette!” Annuals come in literally every color of the rainbow, and the only limit is your imagination. If you want to be absolutely sure of a splashy display, you can use the following principles.
However, sometimes rules are made to be broken, or sometimes a combination idea happens accidentally or just occurs to you. Not only are annuals reliable, but they’re also forgiving. So feel free to try anything, removing or shifting plants around as you fine-tune. Yes, you can move an annual from one place to another without much trauma (just get all or most of the root system when you do, and water the plant in well in its new home until it adjusts).
Throwing a bunch of flowers together in a flowerbed or container can look like a lively bouquet, or it can look like a hodgepodge. So try to decide on a mood or focus and stick to it. Here are some useful color principles you can try:
- Go for the bold: Mix annuals in bright primary shades of red, yellow, and blue. Ideally, they’re of the same color intensity so one doesn’t steal the spotlight. Yellow zinnias with blue calibrachoa is a stunning combo.
- Hot, hot, hot! Compose an exciting, traffic-stopping display out of any or all of the following: hot pink, bright orange, ruby red, magenta, and bright purple. Try some bright orange marigolds combined with purple petunias.
- Soft and sweet: If you like romantic, soothing pastels, go for colors of similar strength or intensity; combine pale yellow, lavender, pink, baby blue, and cream rather than white. A tranquil pairing is lemon-colored osteospermum with powder blue verbenas.
- Aim for contrast: Colors considered opposites (complementary colors) —such as orange and blue, yellow and purple, and red and green — look terrific together. Orange nasturtiums topped with blue salvias is a good choice.
- Use neutral hues: These colors go with everything and thus make nice, calming filler in a display that may otherwise look busy or cluttered; try cream, beige, silver, or gray (supplied by foliage if not flowers). An occasional white-flowered annual is also welcome in color-filled layouts. Silver leafed foliage plants like the dusty millers can be nicely combined with any white-flowered plants like angelonias or petunias.
Taking advantage of annuals shape, height, and structure
Contrary to popular belief, not all annuals are little bloom-studded muffins. Hardly! Try to install annuals with a range of plant habits — variety is the spice!
Here are some good ideas for making annual diversity work for you in your garden displays:
- Small in front, medium in the middle, and tall in back: This tried-and true guideline works because plants don’t block one another from view, and the stepping-up effect simply looks great and adds dimension to your flowerbed. It makes a display look full and is especially effective in small or tight spaces. Thus, for island beds (in the middle of your lawn, say) or containers, you want small plants on the edges, then medium plants, and finally tall ones in the center.
- Repetition and balance: Plant so that one plant habit (or form) recurs at regular intervals in the display. This touch supplies continuity and naturally looks pleasing. Vary what happens between if you wish.
- Simplicity: The smaller the area is, the more important it is to avoid clutter. Use several or many of one kind of plant, together. Or stick to one sort of plant habit but vary the types of plants or the colors. Gardeners usually don’t combine annuals with perennials because when frost kills the annuals, big holes appear in the planting. However, annuals are great to add among smaller, newly planted perennials to provide fast color the first season. The following year, the perennials come into their own and fill the space once occupied by the annuals.
Cold weather annuals
Some annuals like it cool
Some annuals have their origins in areas with colder winters and mild but not blazingly hot summers. Plant breeders have stepped in to improve these plants’ flower production (the more blooms, the merrier!), add new colors, and select for compact plant habit (shapes or forms). The result is a huge range of good, tough plants that even gardeners with shorter growing seasons can count on. Examples of favorite cool-weather annuals include cleome (spider flower), pansy, Johnny jump-ups (a type of viola), trailing lobelia, and calendula (pot marigolds).
North or South, cool-loving annuals are often a fine choice for the parts of your garden where shade prevails. The shelter of a fence, pergola , porch, or overhanging tree keeps the plants cooler, preserving their flower color, prolonging bloom time, and protecting the plants from drying out in the hot sunshine.
Southern summers are generally too hot for cool-season annuals. Enjoy them until late spring and then tear them out as they begin to flag and replace them with something more durable.
Warm weather annuals
Lots of annuals thrive in hot summer weather, tolerating even periods of prolonged drought in style. Many annuals have this preference because their predecessors, or ancestors if you will, originated in warm, tropical climates with long growing seasons. All plant breeders did was capitalize on or preserve these qualities while improving the plants’ appearance or expanding the color range.
Some warm-weather annuals are actually perennial in some regions but are used as annuals in other areas because they’re not hardy there (they don’t survive the winter). For instance, snapdragon can be a perennial in the South but is used as an annual farther North. Some tropical plants are also commonly used for temporary display.
Examples of favorite warm-weather annuals include impatiens, Madagascar periwinkle, and marigolds.
Finding Flowers that Fit Your Garden
Modern-day annuals are impressive indeed. They’ve been bred to produce abundant flowers and lush foliage throughout the heart of the growing season. They rush to flowering because their means of reproduction is by seed. And to get there, the flowers must come first. This great output guarantees bountiful garden color and also makes most annuals great for bouquets. By the time fall comes and seeds form (if they do, before frost), the plants are spent and die. By then, though, you should certainly have gotten your money’s worth! Annuals are very gracious guests.
Not surprisingly, a huge range of annuals is on the market, and more annuals arrive every year. Demand is market-driven, innovation pushes on, and the upshot is that you can choose from many, many different annuals — no matter where you live, no matter what growing conditions your garden offers. The variety of annuals allows you to find countless plants that are specific to warm or cool weather.
Monday, July 21, 2008
Water Sprinkler Timers
If you have a good idea how much watering your plants need but don’t want to or can’t be there, the water timer’s for you. Though no bigger than a coffee can, some of these gadgets contain a small computer that you can program for watering time and duration. Others have a clever intermittent feature that delivers the water in on-off cycles (for instance, five minutes on followed by a ten-minute rest) over a period of time (say, three hours) before shutting off automatically. This allows the soil to efficiently absorb the water with far less runoff and evaporation.
The fancy battery-operated types with all the settings are handy if you need all these features, but if you’re after simplicity and dependability, you can’t beat the spring-operated ones. One end of the timer attaches to the faucet, the other to the hose end — you have no batteries, no wires to worry about. Some timers are more elaborate (and expensive) than others, so have a clear idea of your needs as well as your technological savvy when you go shopping. You can find water timers wherever gardening supplies are sold, as well as at specialty greenhouse supply companies.
Water timers are most often used with professional installed sprinkler systems
What is Hose-end sprinklers?
Here’s another way to put your good hose to work: A hose-end sprinkler is designed to screw into a standard hose and rest on the ground wherever you drag it and set it down; it then delivers water in a spray pattern in the immediate area. Clever designers have come up with all sorts of nifty alternatives, so you should have no trouble finding a sprinkler you like and that suits the lay of your particular landscape. Here’s a rundown of the common ones:
- Fixed-spray sprinkler: These sprinklers are the simplest types and are perfectly satisfactory for watering small areas. They deliver a fine, soft rain, rather casually (that is, without a super-reliable pattern). Use them on the lawn or for watering flowerbeds and shrubs; they’re less effective under trees because they fling water up into the branches, where it’s neither needed nor especially appreciated. You may have to run the water on low or get a heavier model if it tends to flip over on its side or upside down, a common problem.
- Whirlybird sprinkler: A spring-loaded arm breaks the shooting stream of water into droplets as it snaps back into place, which makes this sprinkler revolve. This deceptively simple design can actually accomplish a very thorough watering job in a circular shape.
- Rain tower: The rain tower is just an impulse sprinkler like the whirlybird, but it’s elevated on an adjustable tripod contraption so it can water a broad circle. Therefore, it’s terrific for watering large areas of tall plants, such as a corn patch or vegetable garden.
- Oscillating sprinkler: You have to set or assign these sprinklers their job, which can be a full-yard swing from left to right and back again, or a half-swing to the left or right, or just a held, stationary position. Oscillating sprinklers are marvelous for watering lawns and broad plantings. Splurge on the more expensive units; they last much longer and offer a greater range of settings that can make your watering more accurate and efficient. Compared to a whirlybird sprinkler, oscillating sprinklers tend to lose a lot of water to evaporation.
- Tractor (traveling) sprinkler: The tractor sprinkler is a little more hightech, at least for a homeowner. The small water-driven tractor scoots slowly across a lawn, using the laid-out hose as a guide. Meanwhile, a simple revolving sprinkler mounted on top does the watering. Some models have three speeds, for lighter to deeper watering.
Understanding Garden Nozzles
An awful lot of hose accessories are out there. Rarely are they expensive, so you can give one a try and see how you, and your plants, like it. Here are some of the common ones; they all screw onto the end of a standard hose:
- Watering wand: This gadget extends your reach for watering hanging baskets or irrigating the back of a deep flowerbed. The rose, or head, at the end of the wand delivers the water in a gentle, drenching spray. The watering wand is also nice for watering potted plants and seedlings if you keep the water pressure low so you don’t dislodge the little plants. Get a wand with a thumb-operated on-off valve so you can move from plant to plant without wetting things you don’t mean to or wasting water.
- Jet-spray nozzle: Usually brass, this tool focuses water into a strong, stiff spray. It’s ideal for hosing off muddy tools and boots or cleaning a walkway or driveway.
- Adjustable round nozzle: A refinement of the jet-spray nozzle, this nozzle can also deliver a softer spray right on down to a mist — all by twisting it until the water is coming out the way you want.
- Misting head: Though small, this tool can be a bit pricier because it usually comes in brass or brass-coated die-cast metal. It delivers water in a fine mist, nice for little emerging seedlings.
- Pistol-grip nozzle: Usually made of tough, UV-resistant plastic, this nozzle is a favorite among gardeners because you can vary the intensity of the spray by applying pressure to the trigger and thus use it throughout your garden.
- Fan head: This tool delivers a drenching sweep of water from its broad, broom-head-like end, making it a good choice for bigger watering projects like irrigating a newly planted shrub or rosebush.
- Multiple-head nozzle: These nozzles are showing up more frequently on the market. They have several types of nozzles built into one head and are quite handy.
Subscribe to:
Posts (Atom)